Some of my students this year were excited to “celebrate” pi day and were very disappointed that it fell on a Saturday, so we decided to have some pi fun on Pi Day Eve. I am not one for “gimmicky” holiday lessons and wanted whatever I decided to do, to not just be definitions of circles and their properties or a formula for how to use pi to find measurements, but instead an activity that allowed students to discover all of the cool things about circles and patterns that arise from that work.
After brainstorming with a colleague, she suggested I just have the students try to create a prefect circle. Loved it. I put out tape, scissors, rulers, paper, string and told them if they thought of other tools they wanted to use, they had to pass my approval first (I wanted to keep the protractors and compasses out of the equation for right now). Off they went! It was soooo interesting to see all of the great approaches and all of the cool ideas that emerged from their work.
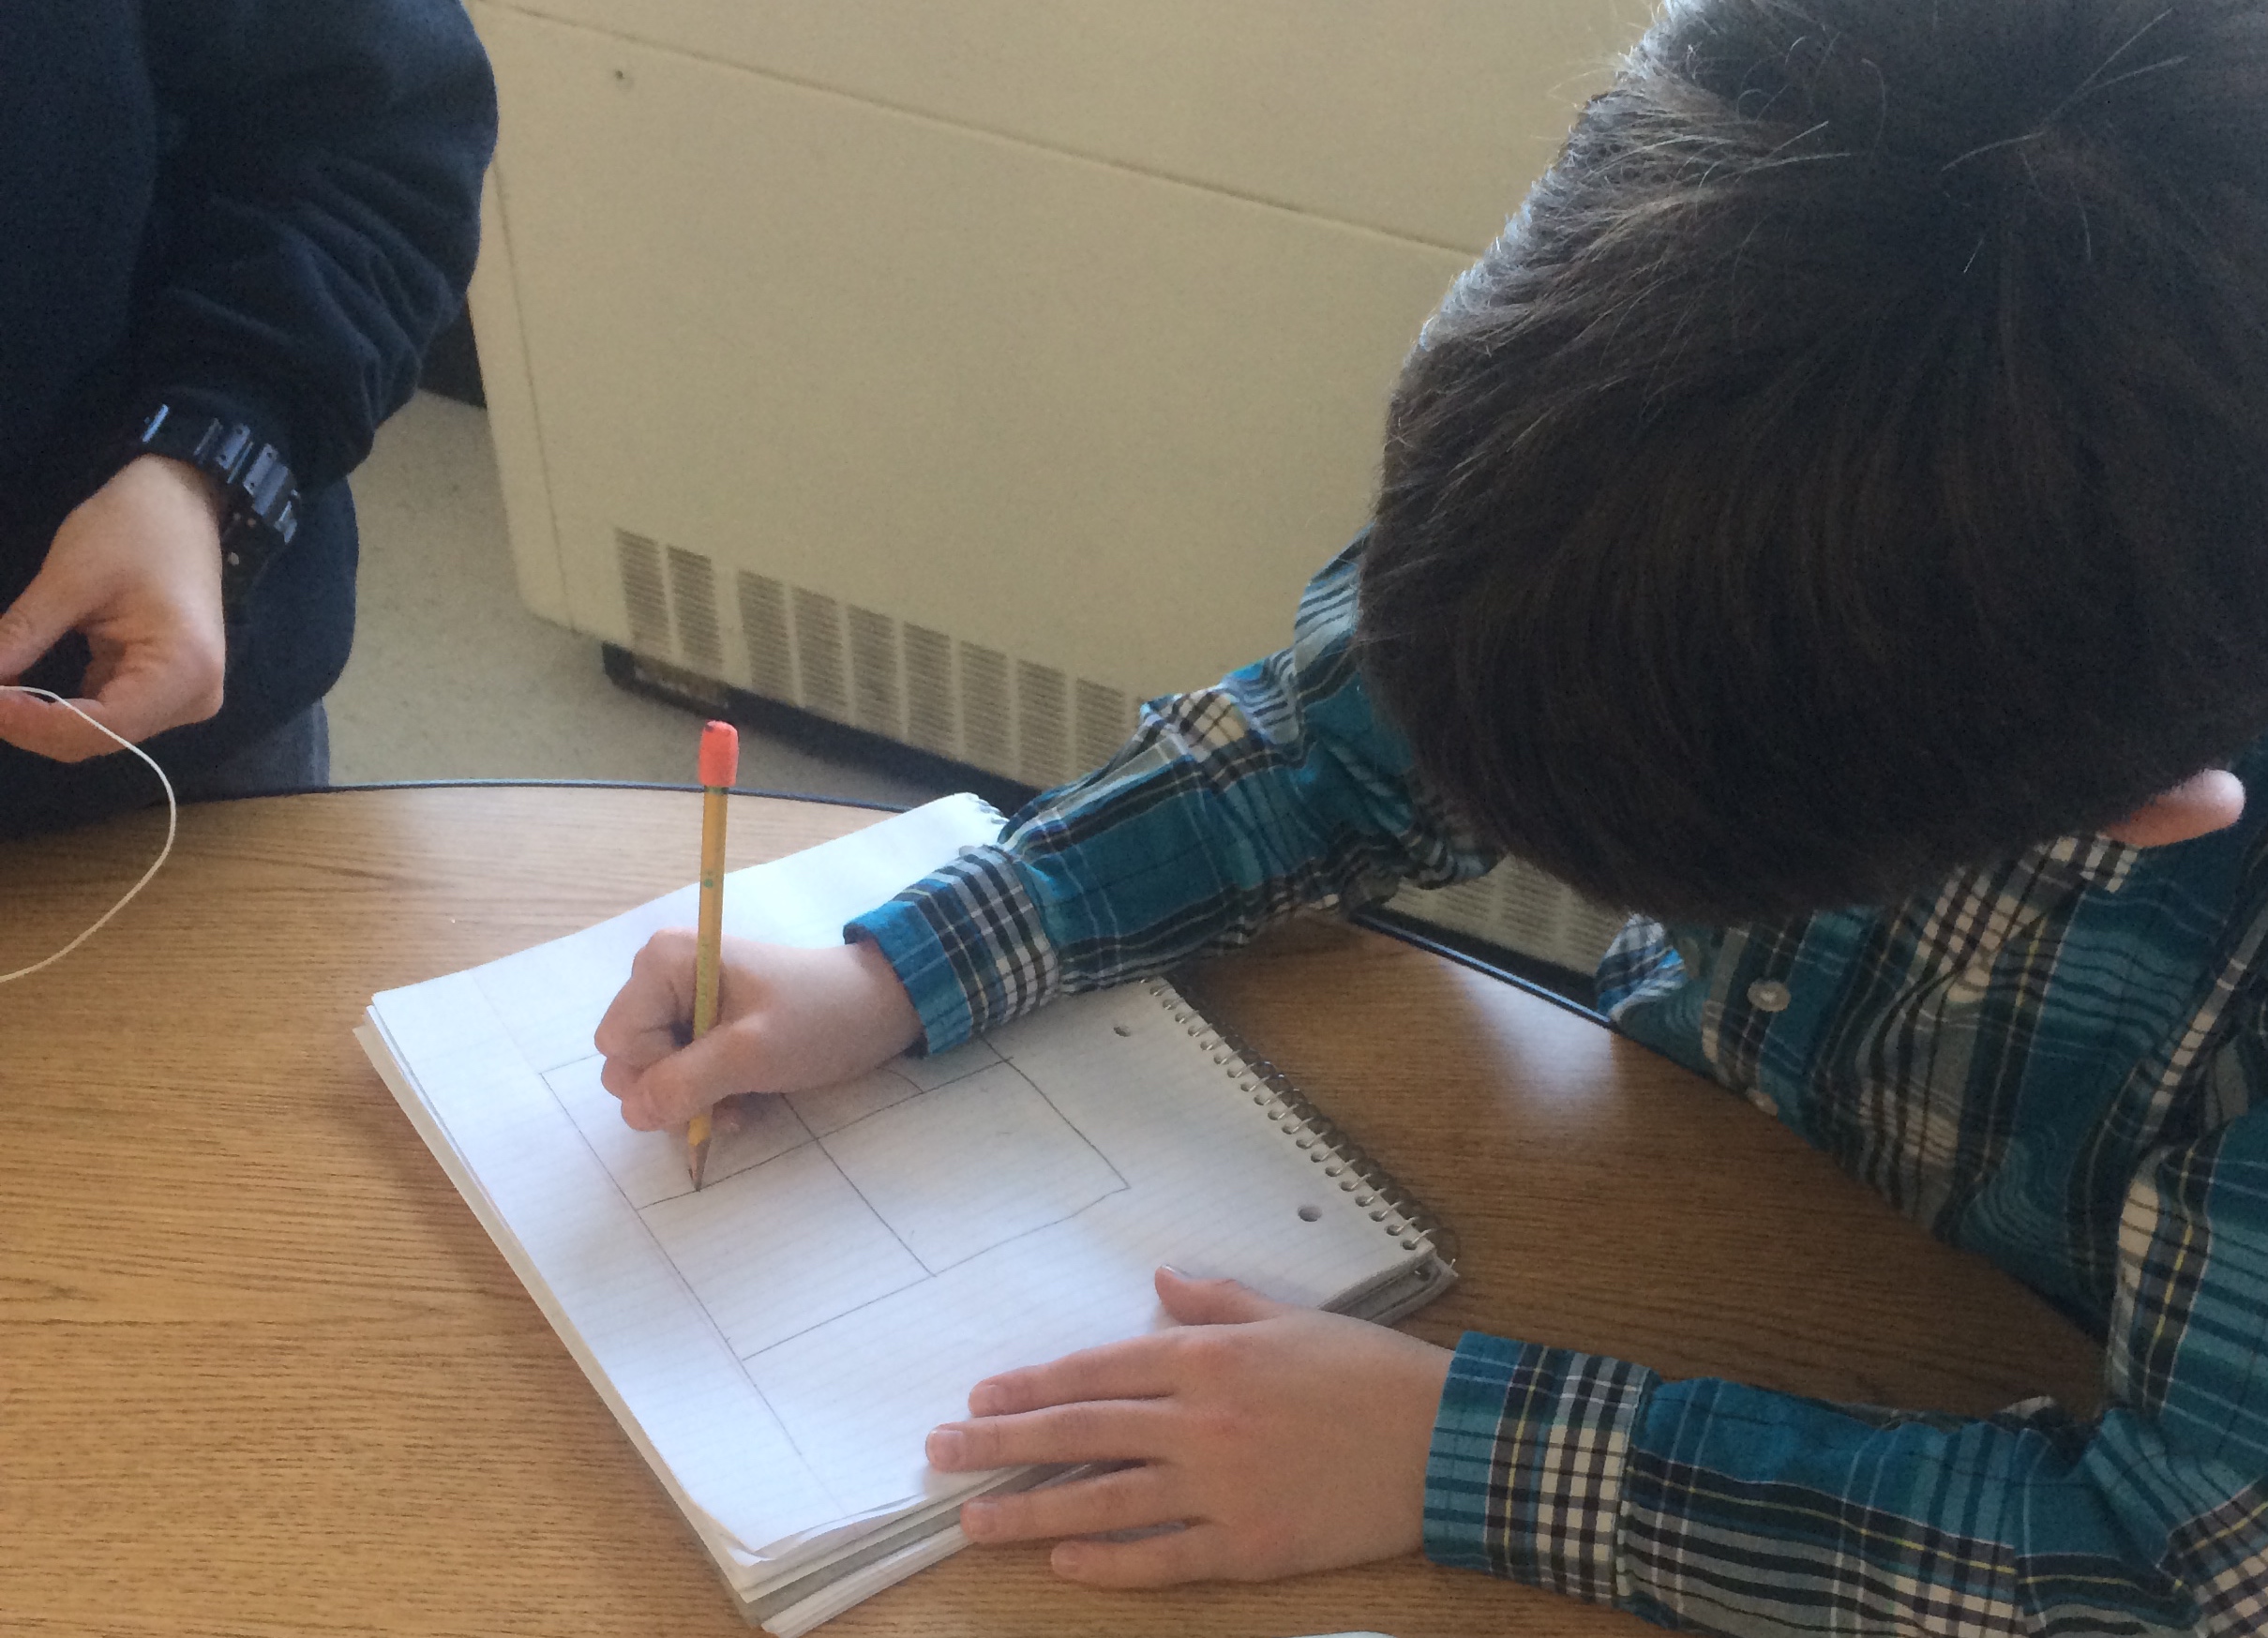
I found it so interesting that quite a few first drew a square and tried to find the center. They said they knew that the circle could be made inside of it because a circle is 360 degrees and each angle of the crossed lines was 90. The problem became figuring out how to get the “rounded edges to be the same.”

Quite a few groups had seen a compass before (but didn’t know what it was called) and tried to recreate one with the available tools. Some started from finding a center and going from there, while others created the center by just placing the scissors on the paper and going around from there. After many attempts, they were starting to realize how important keeping that constant distance in the scissor opening really was.
To solve the constant distance problem, one group used tape to keep it the same while another group used string (and chopsticks she just happened to have in her lunchbox that day:).
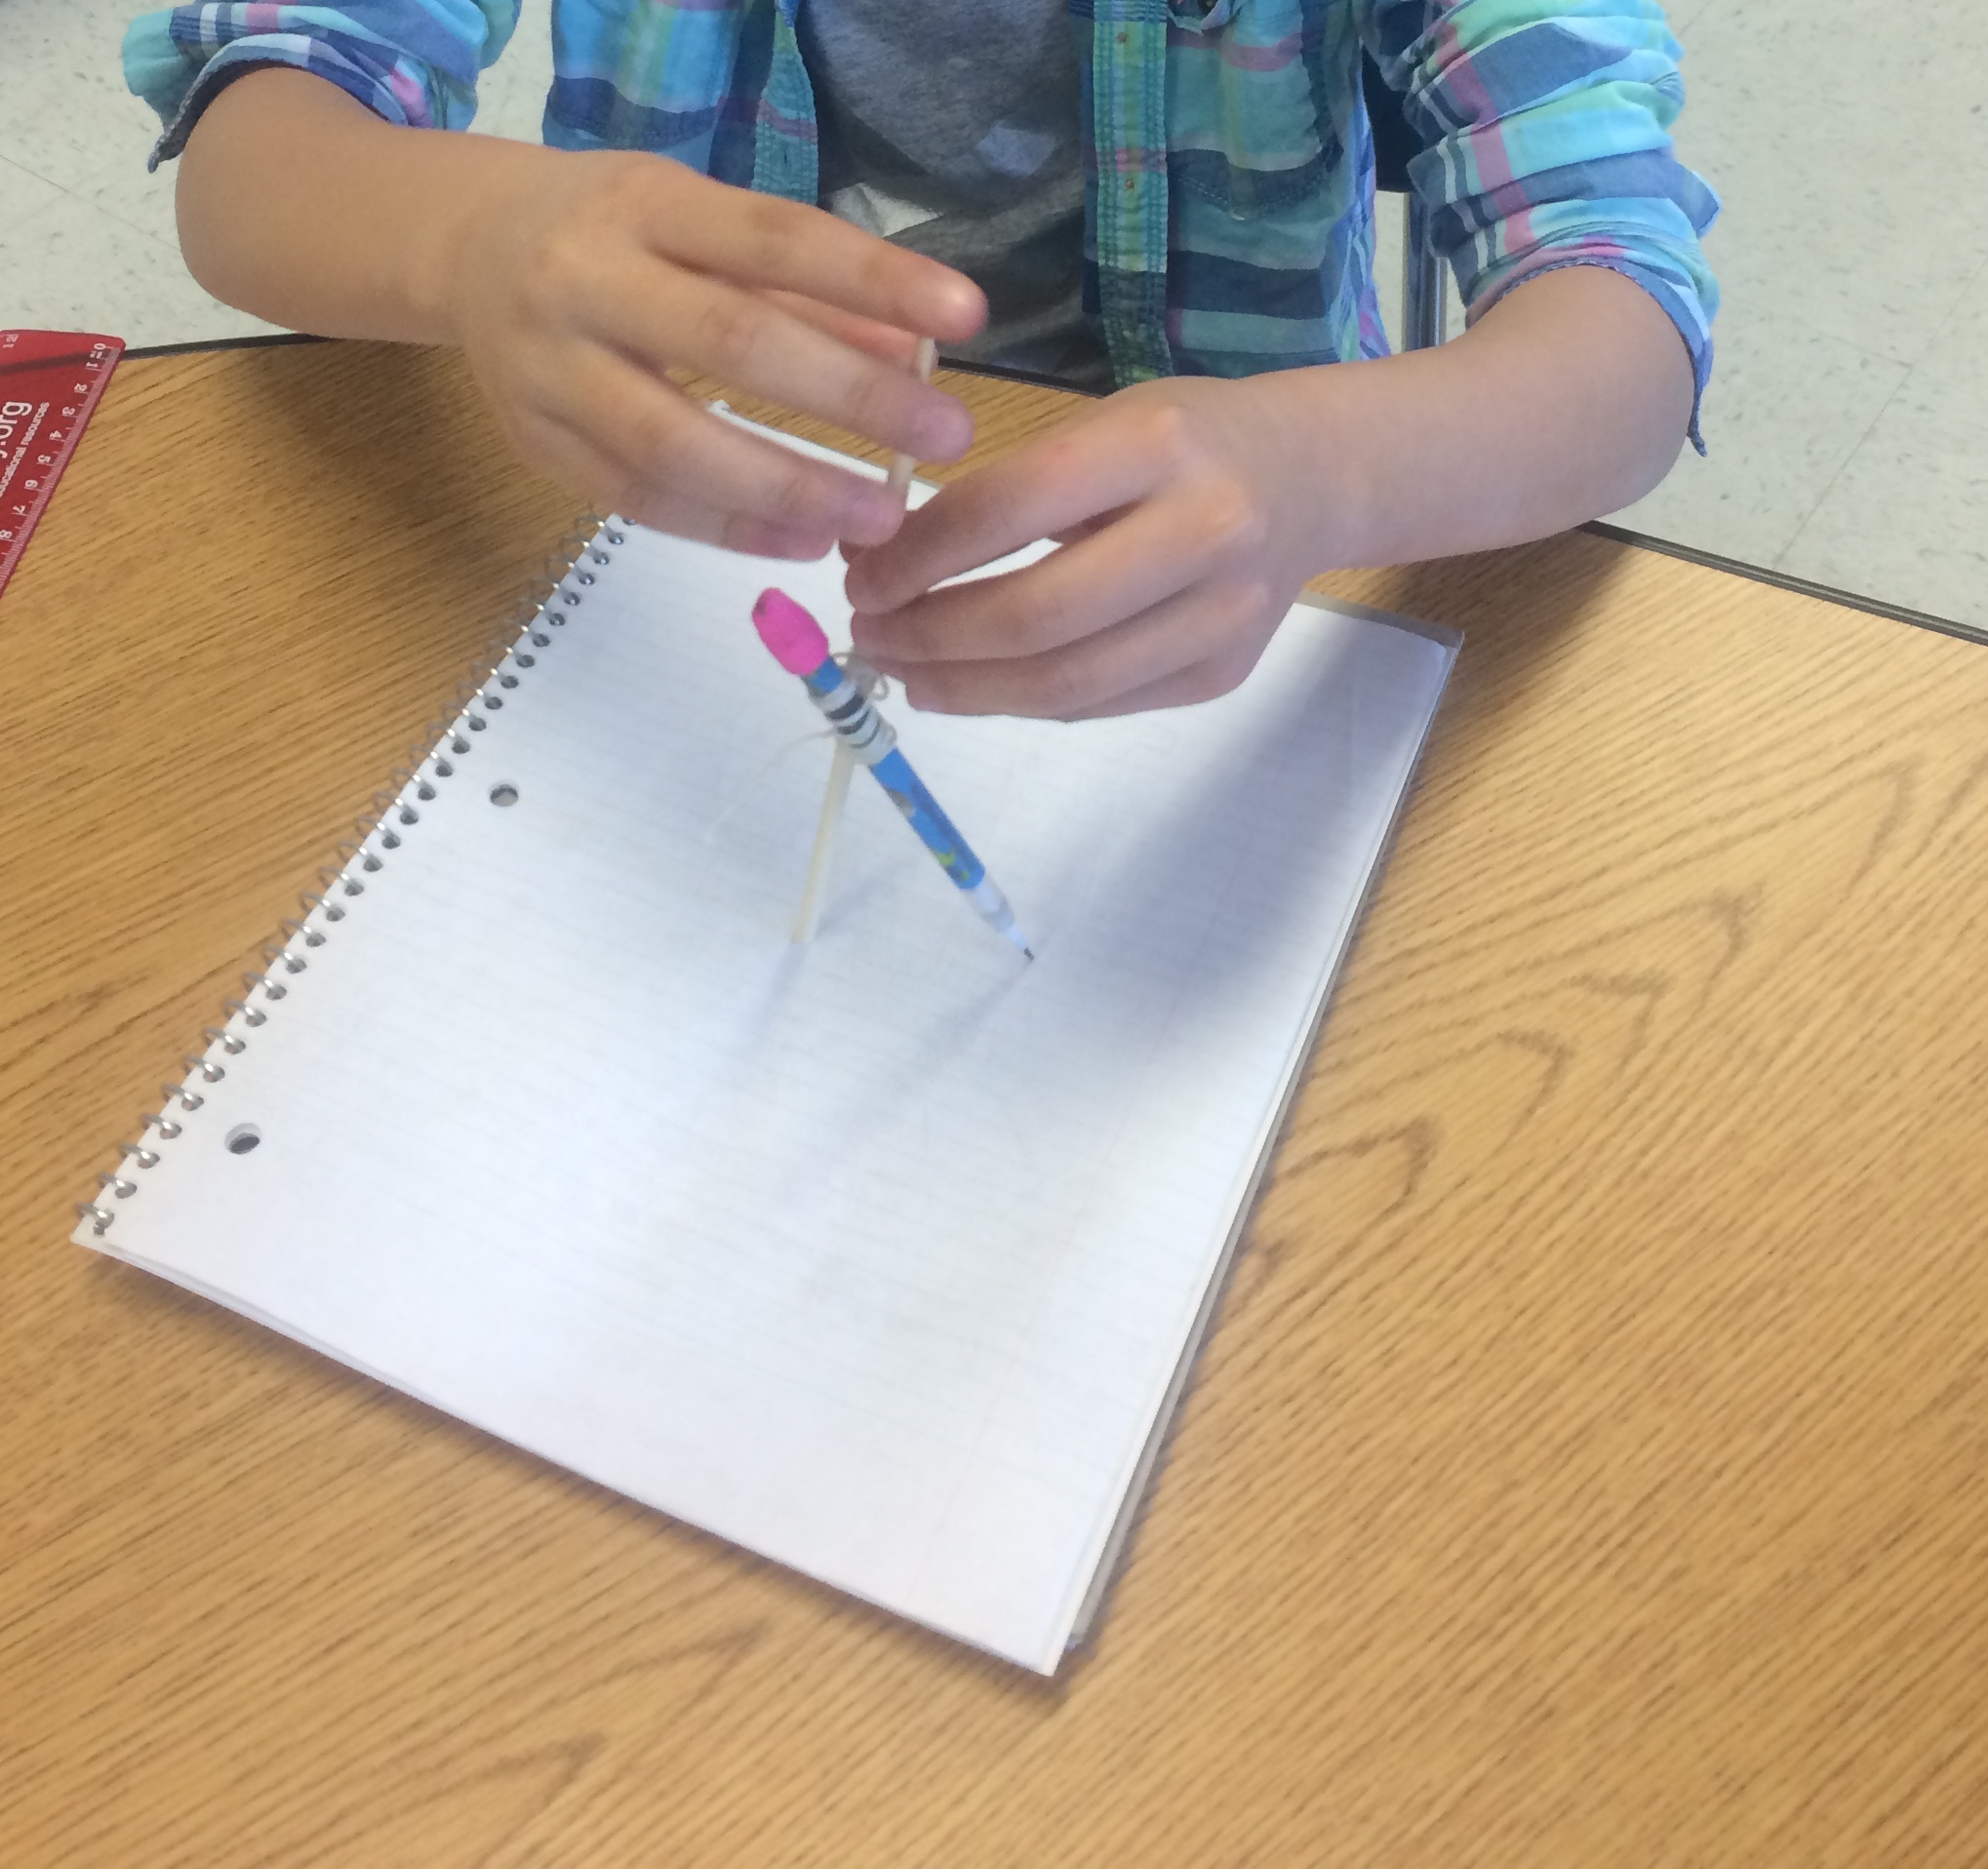
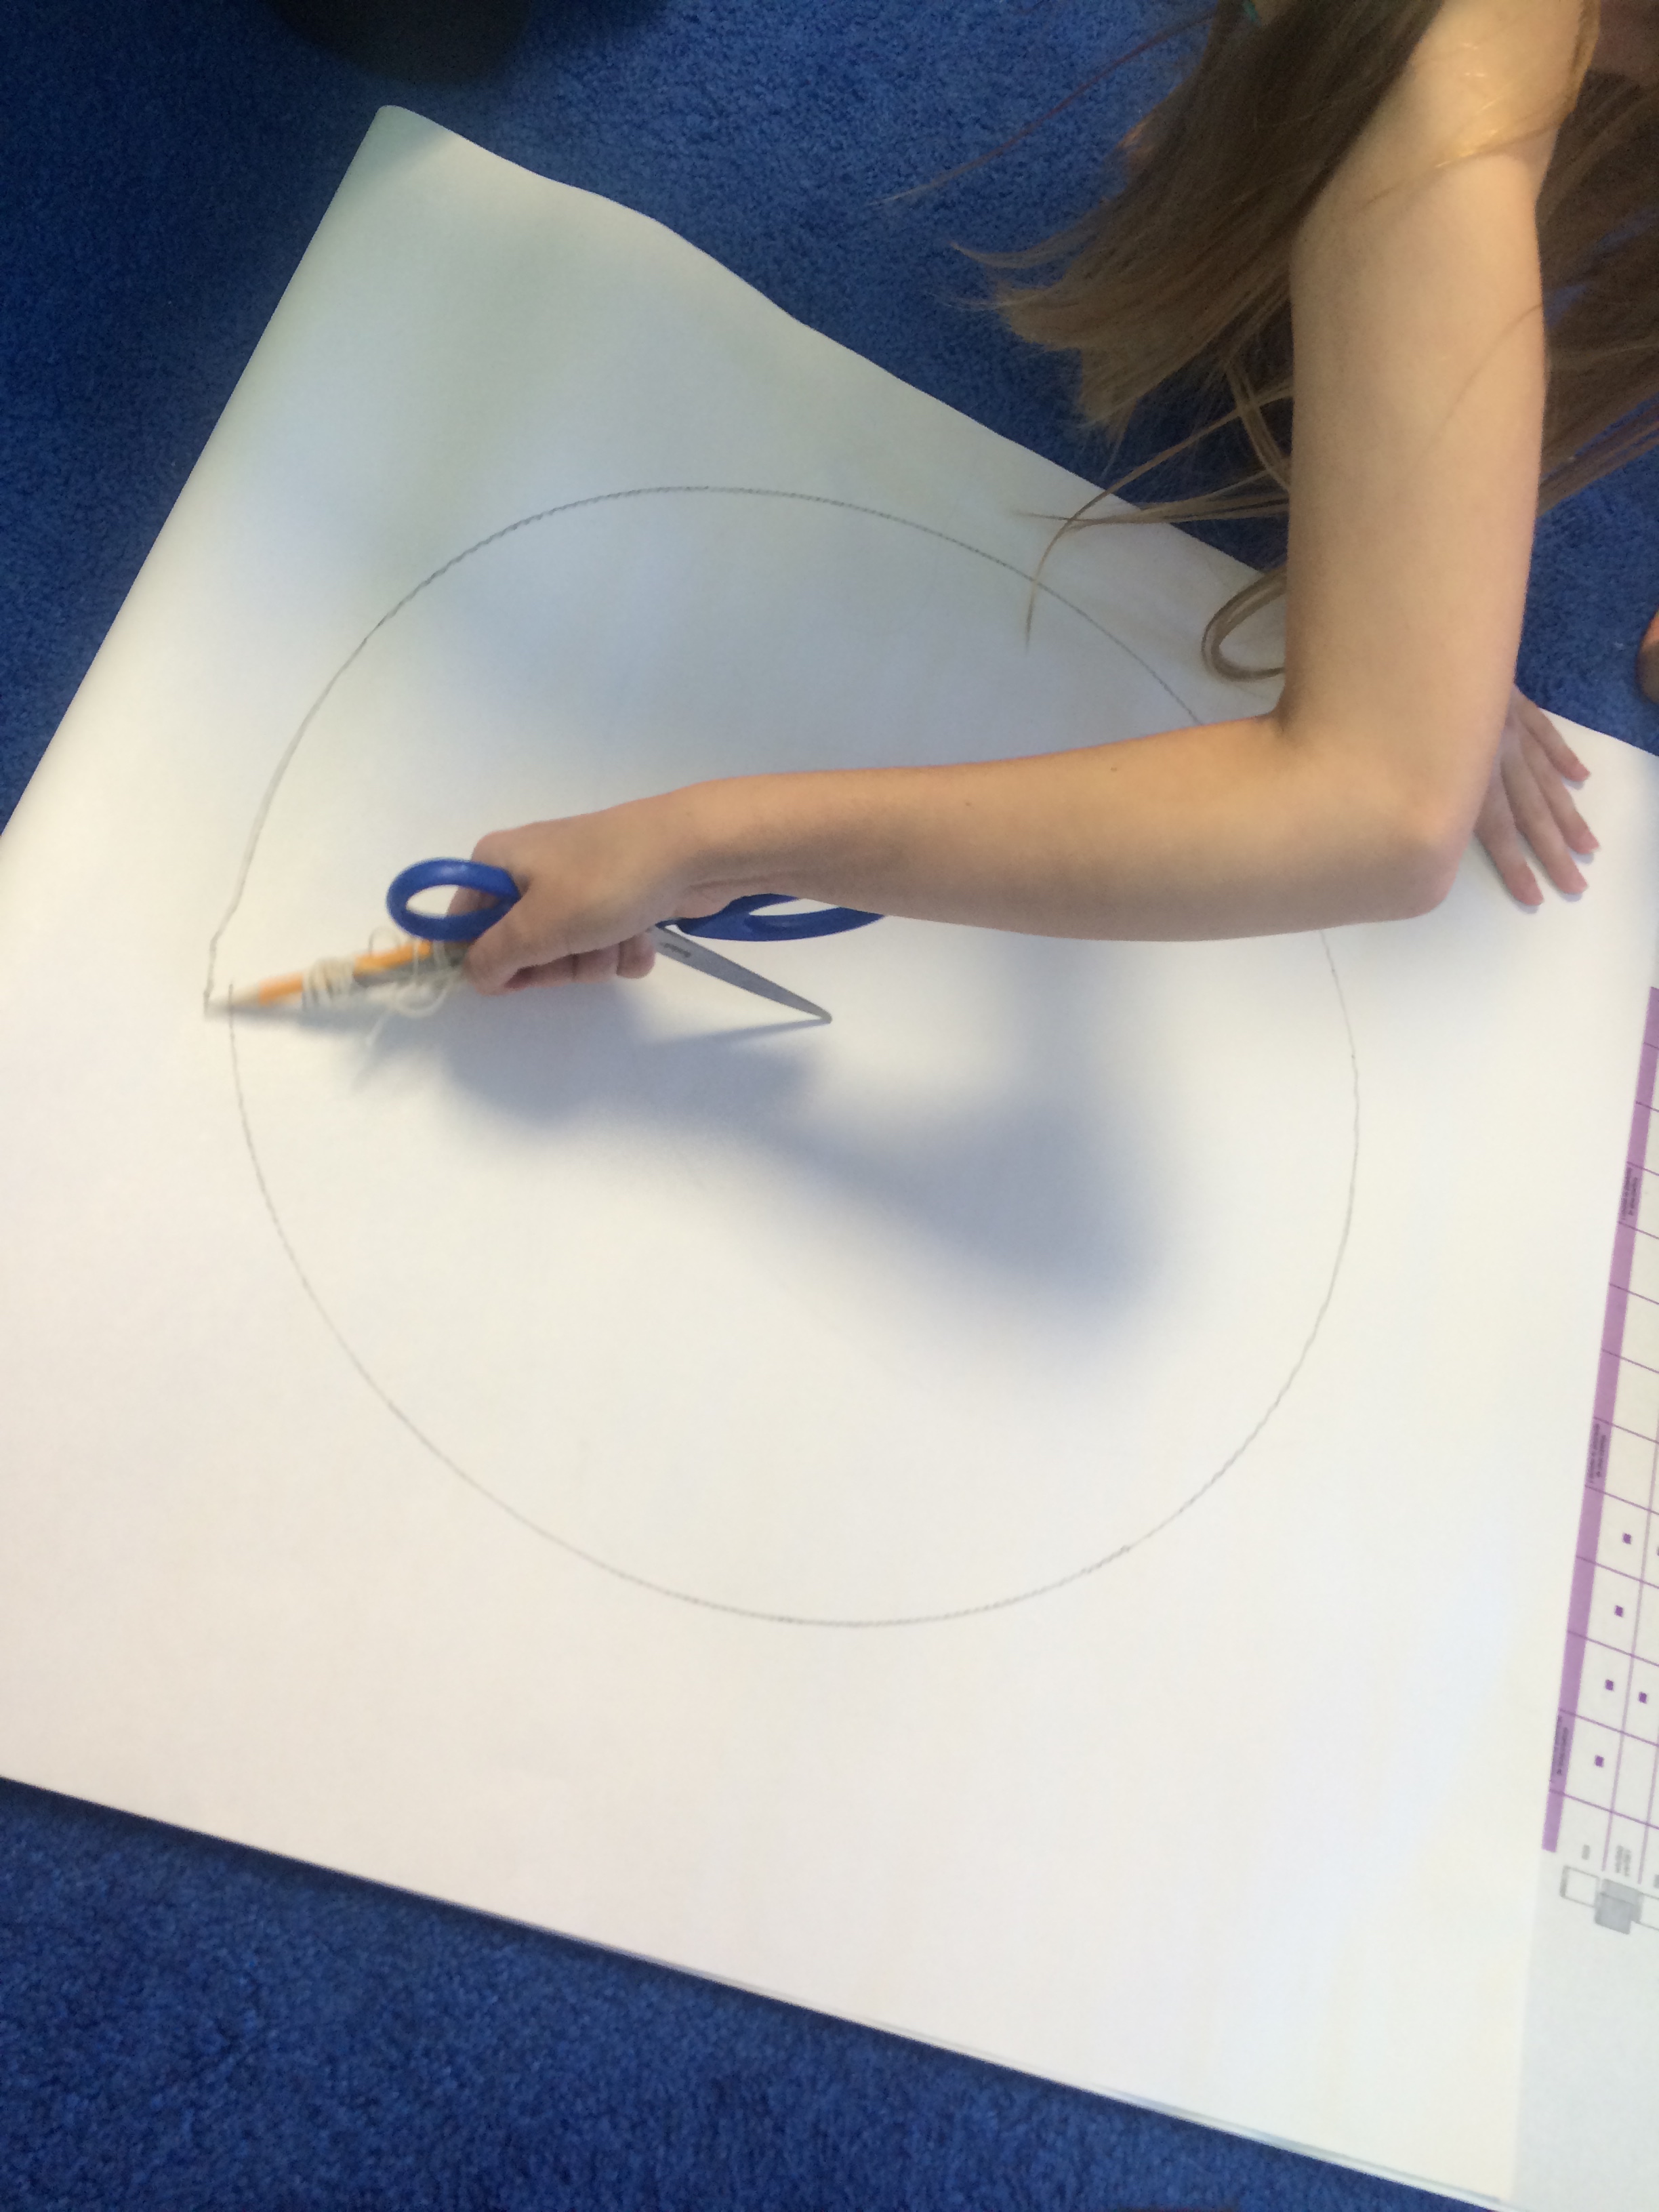
This group solved the constant distance with two pencils attached with string. The funniest part of this one were the trials as the string kept wrapping around the center pencil as they went around and never meeting exactly back at the start. They eventually figured it out after blaming the “center holder” numerous time for “moving the pencil.” Another group kept a constant distance by taping their string to the center of their paper and putting a pencil on the other end.
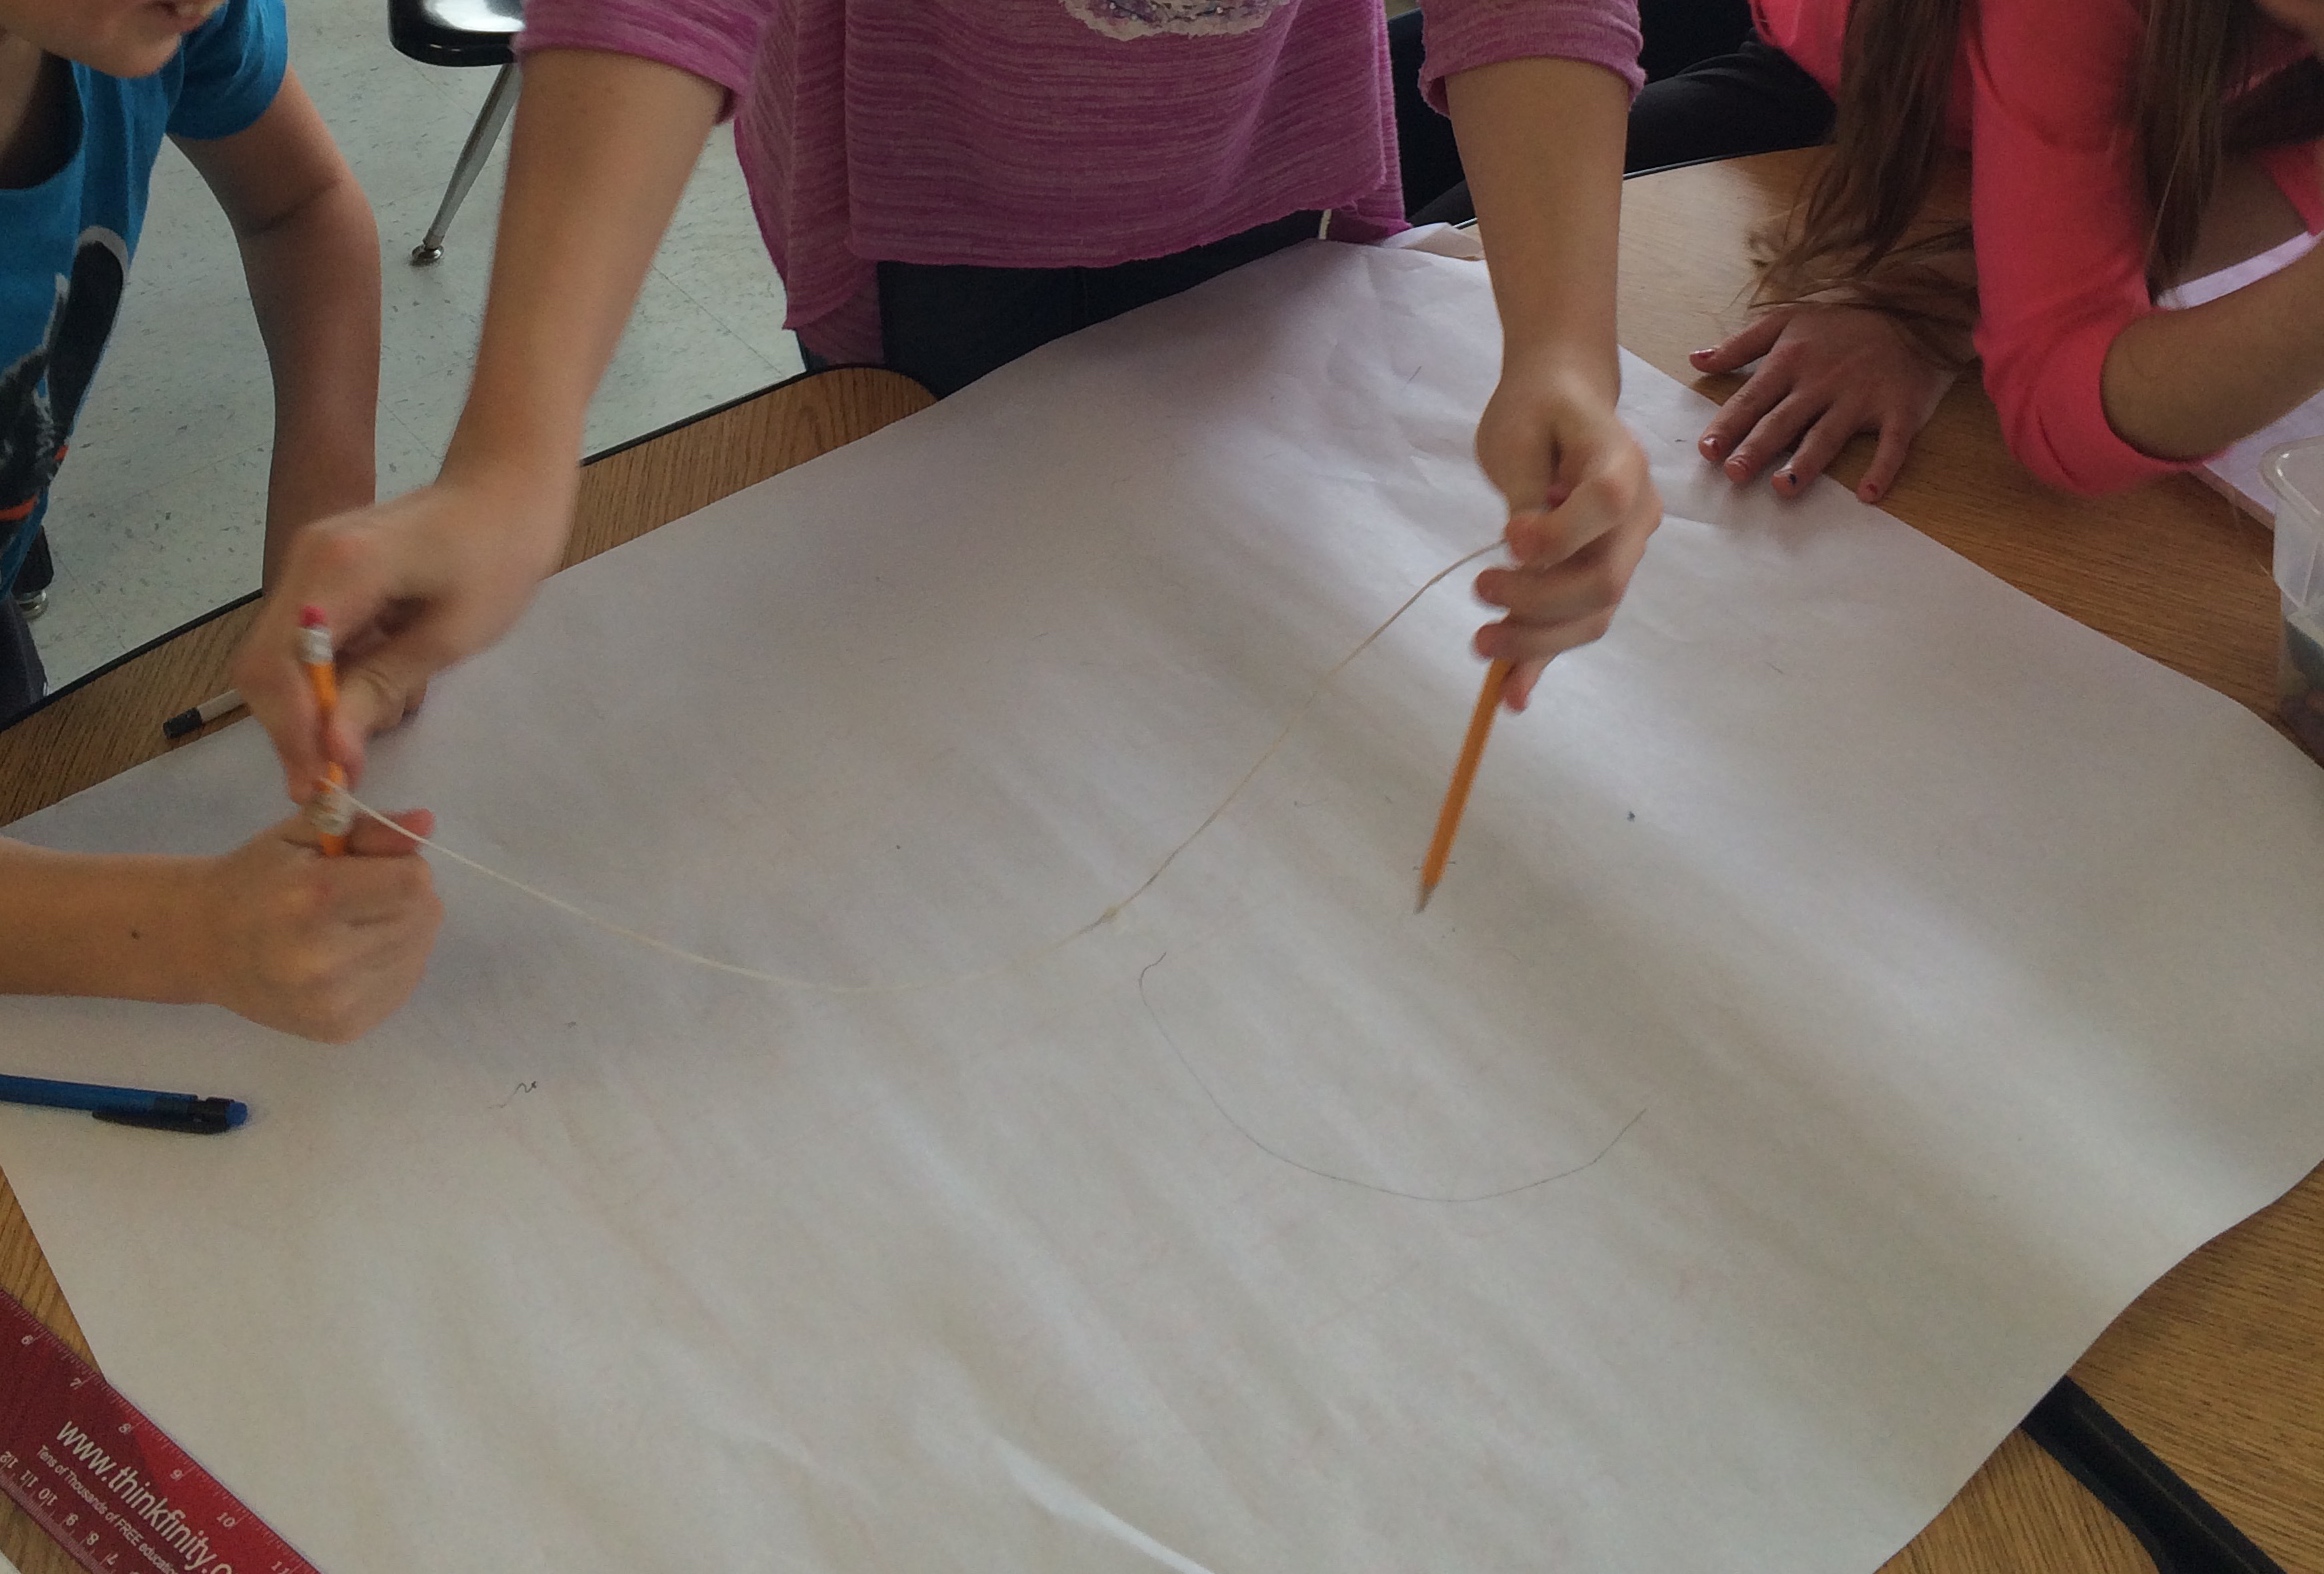

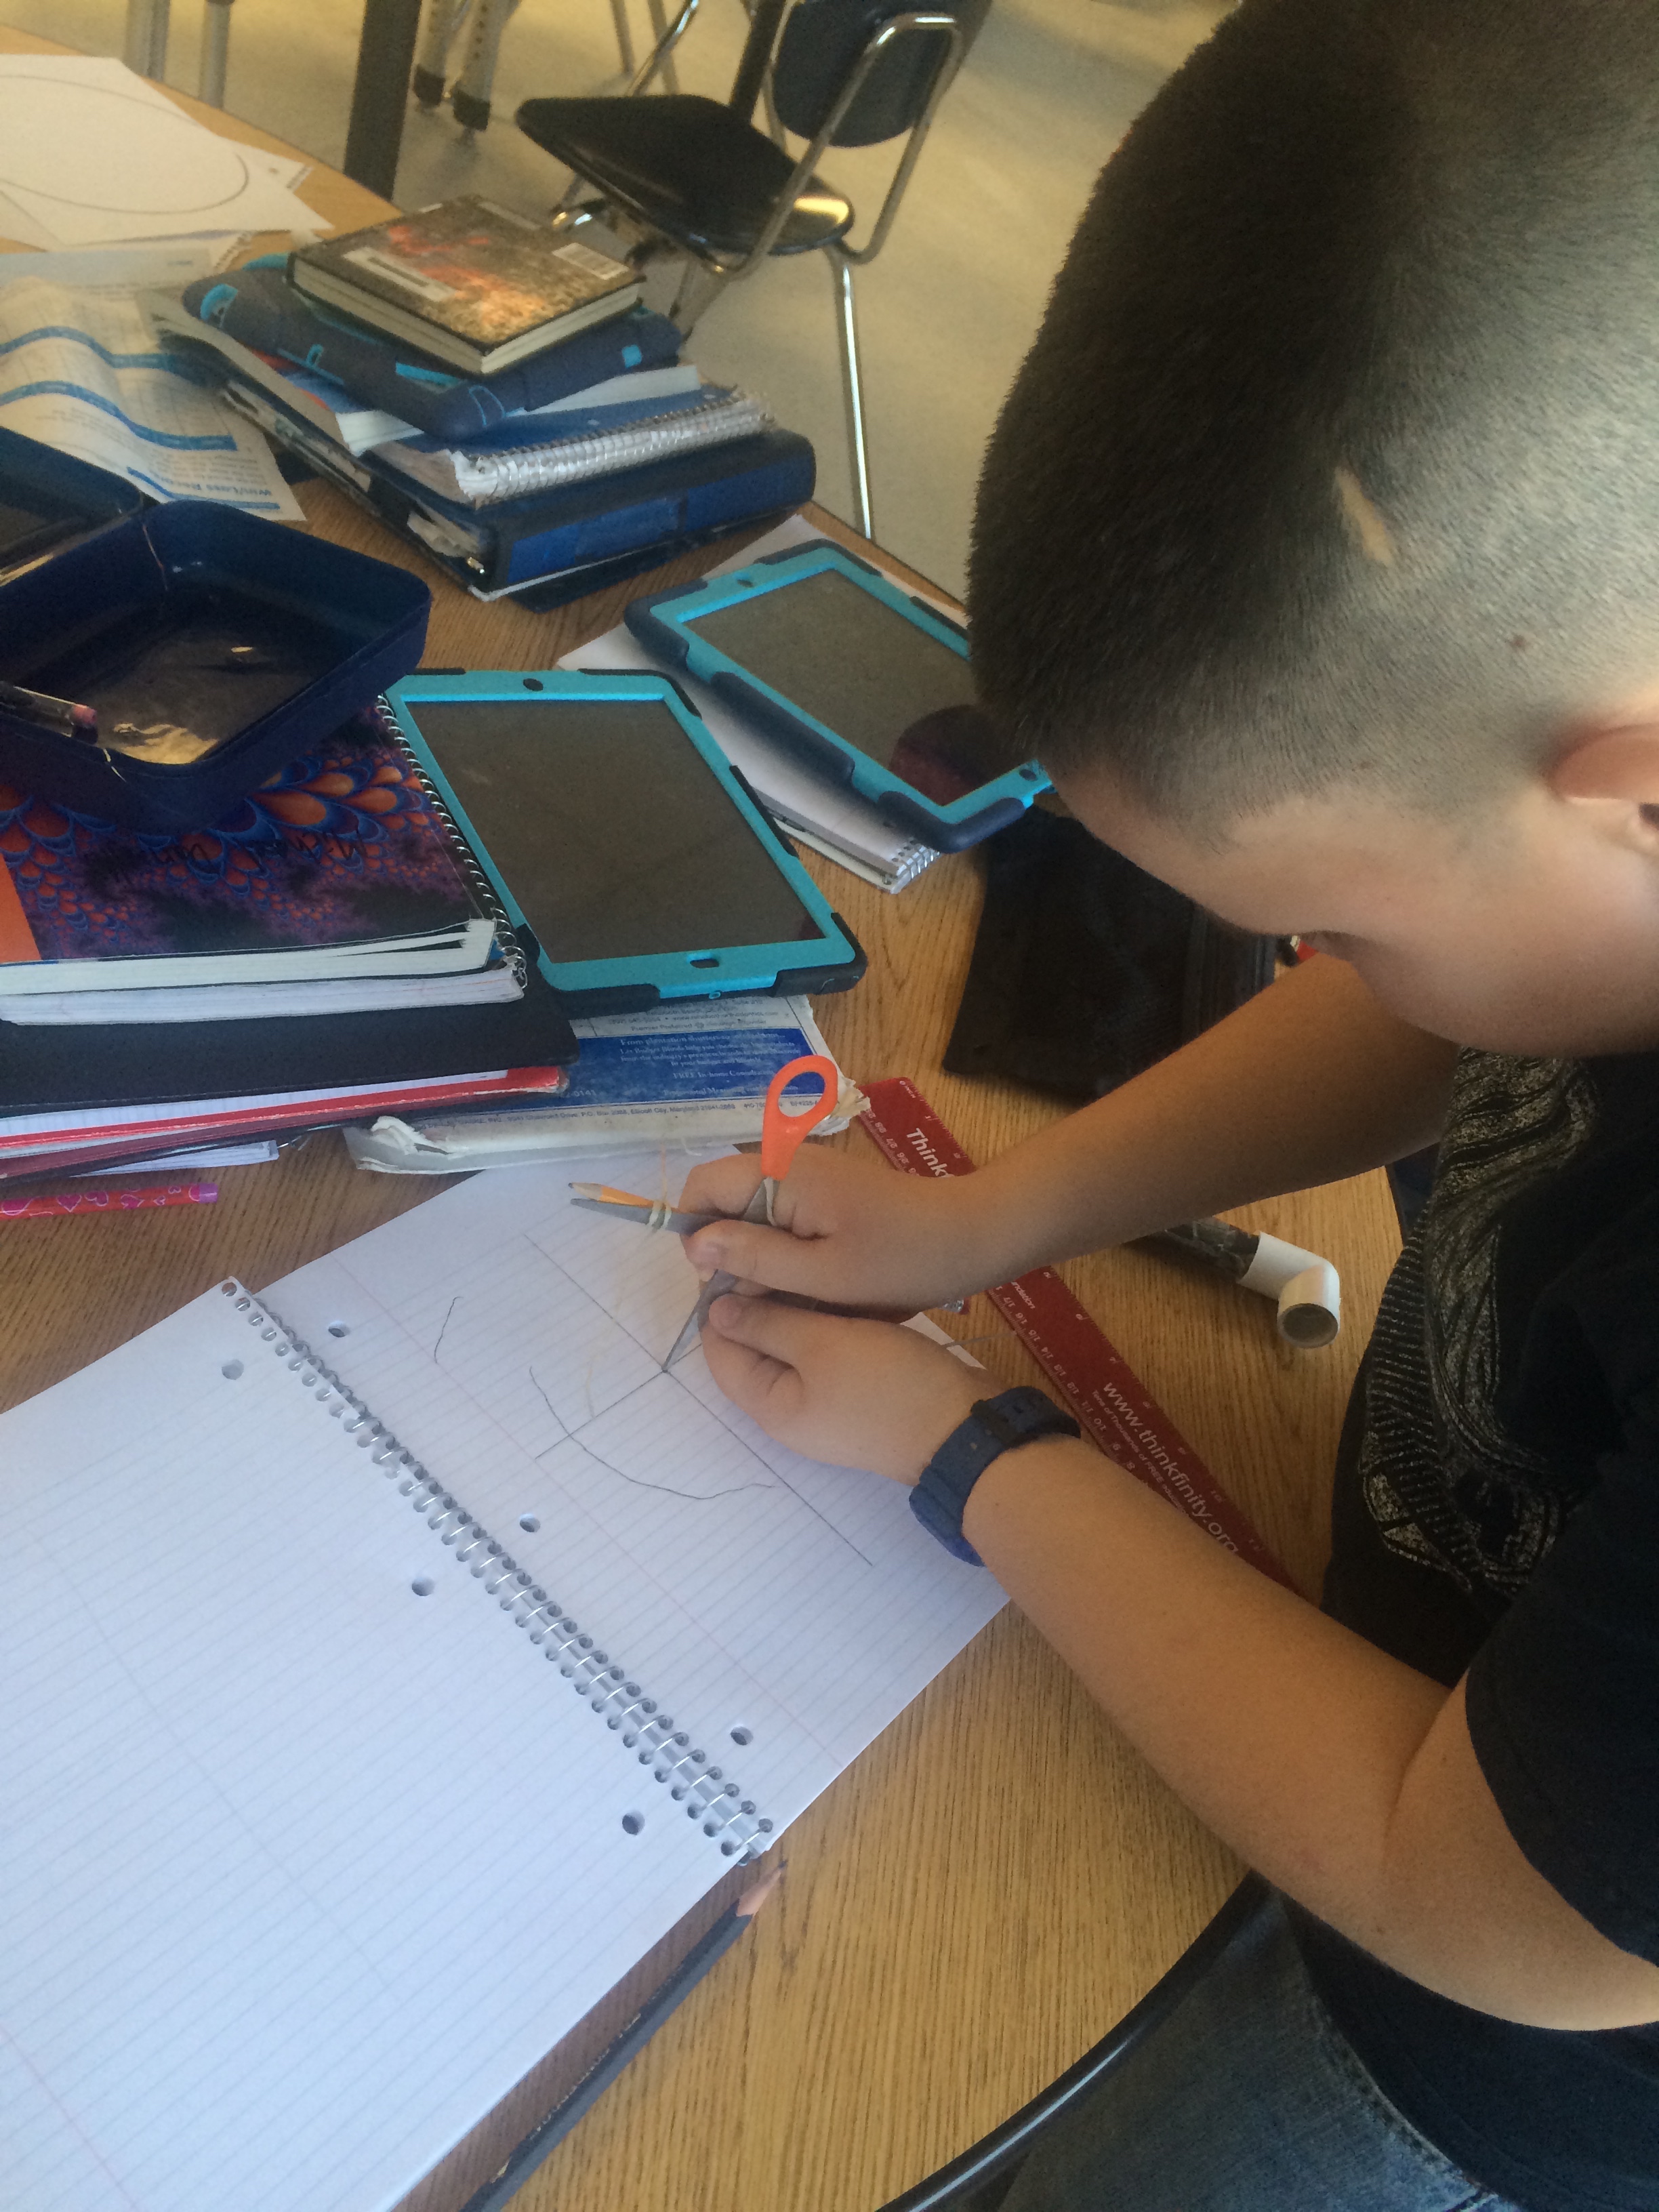
This group created a center from overlapping rulers and attempted to put string around the the ruler corners to make an arc, but couldn’t agree with how to get them all the same. While another group tried to use the ruler ends as the center but ran into the same problem with the rounded edges.


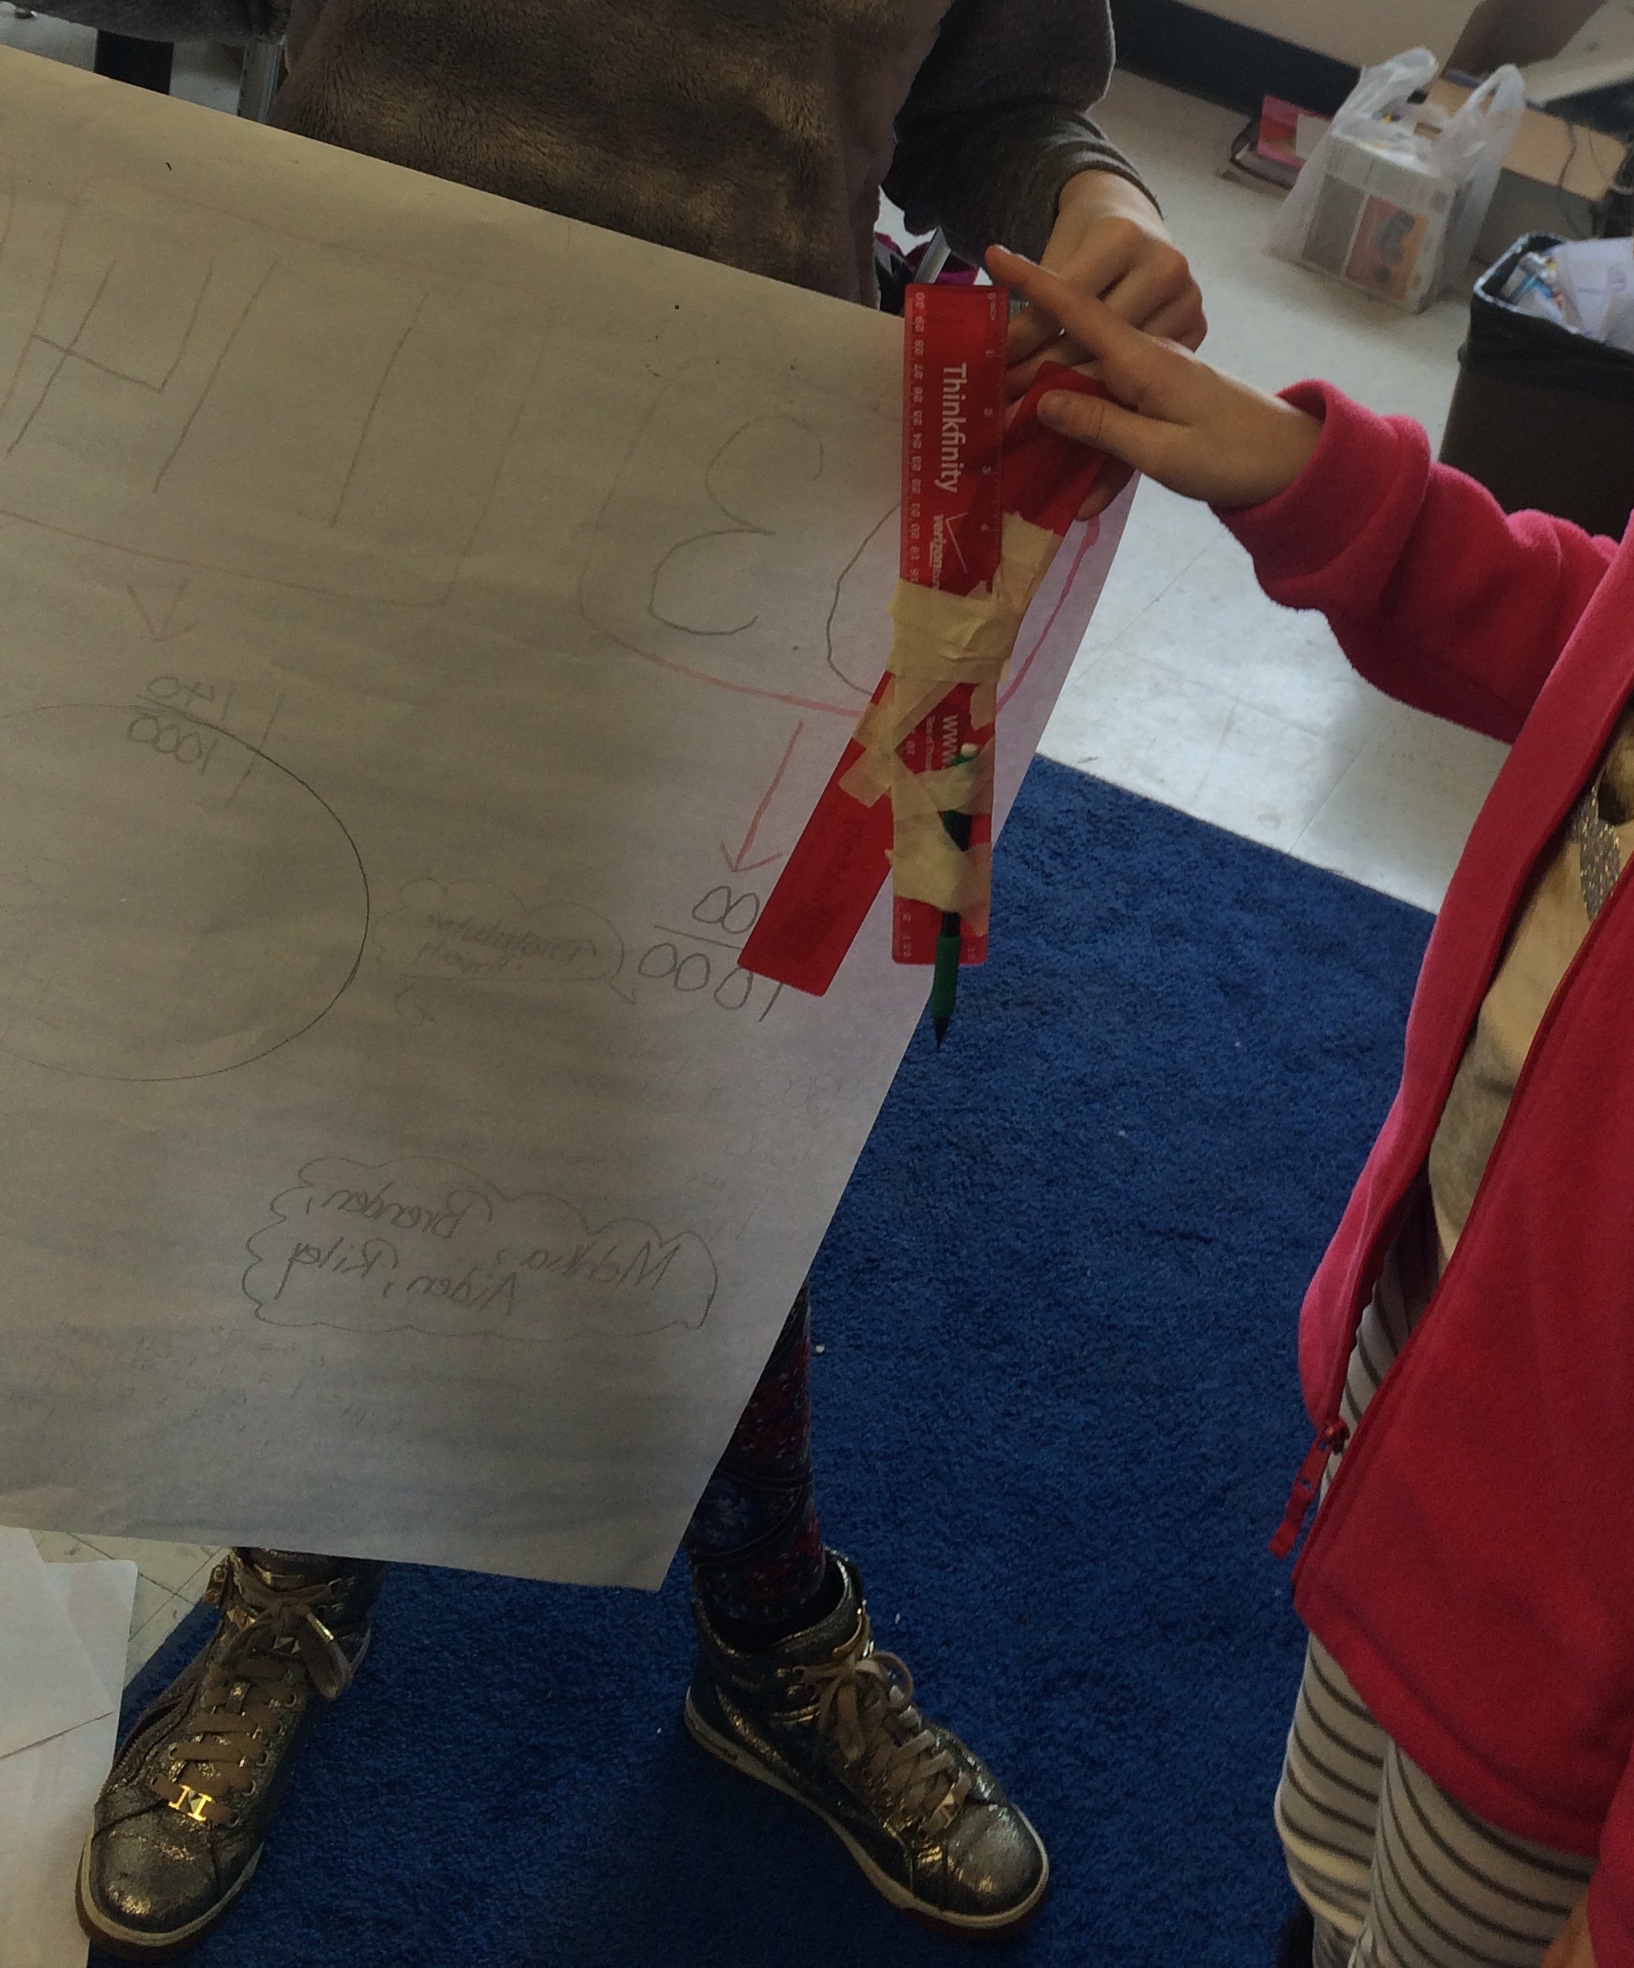
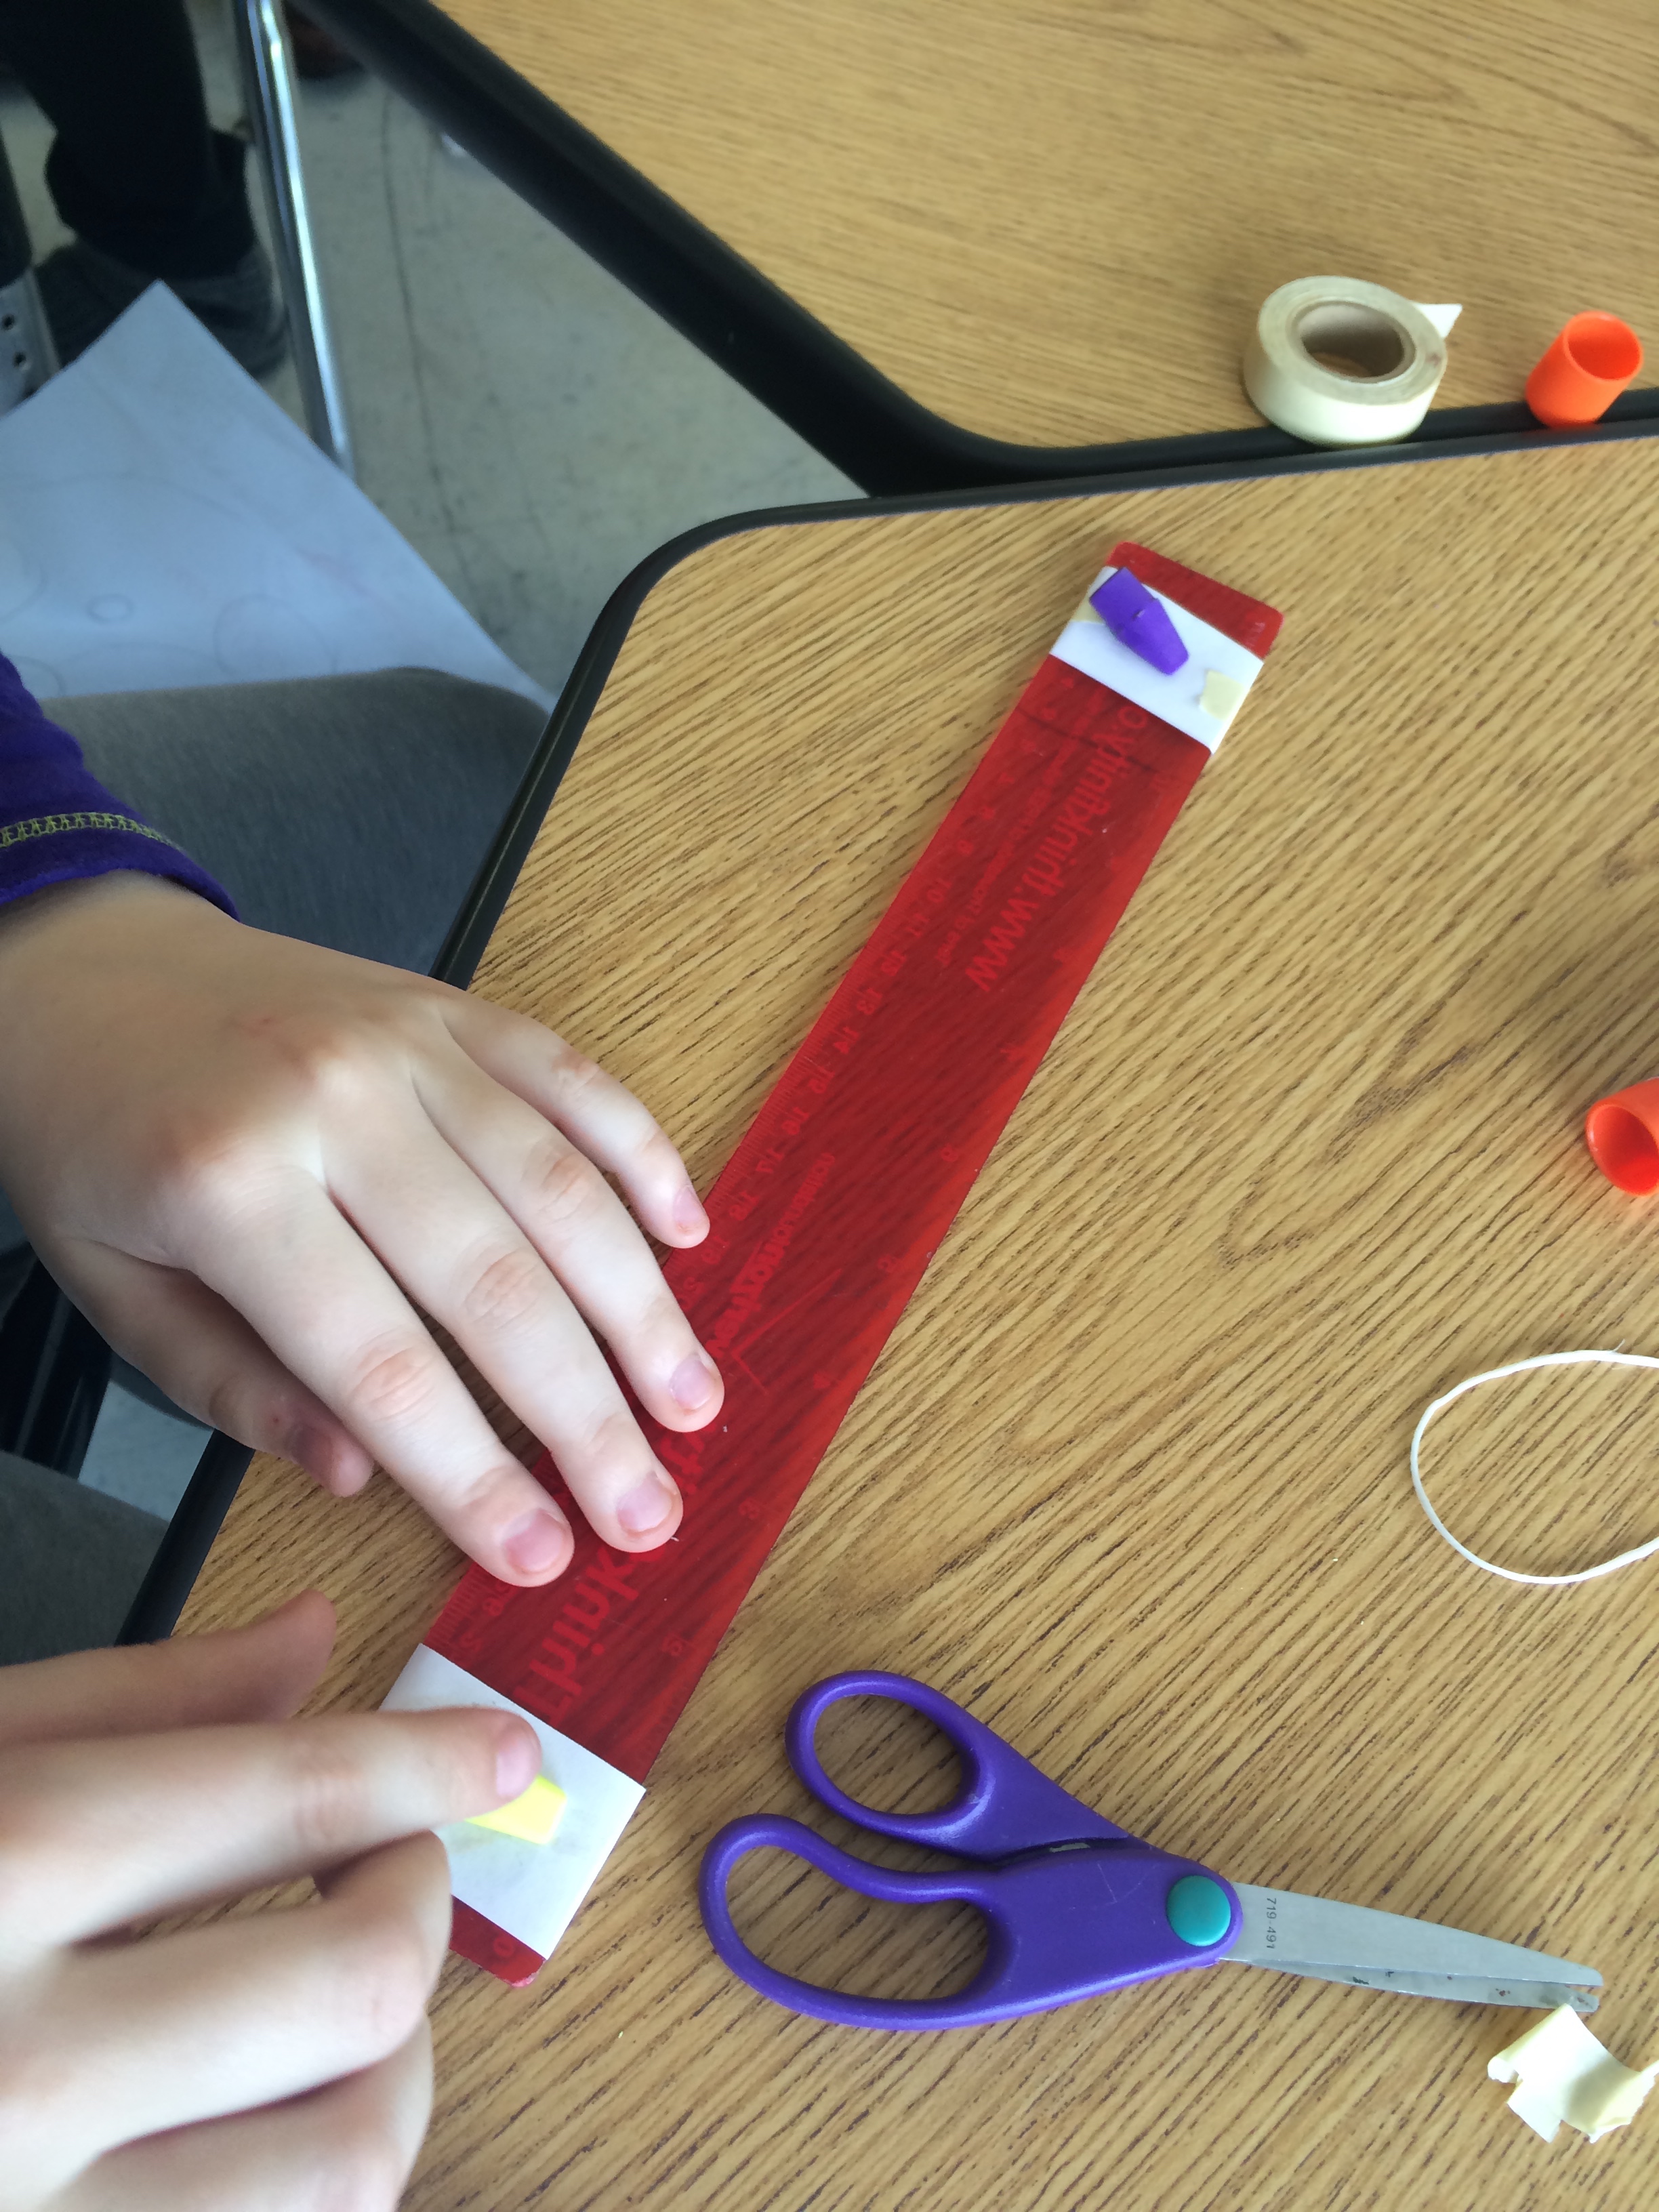
This idea was interesting to watch evolve. She had seen the group on the floor (in the pic above) and said she realized that any rectangle rotated would make a circle. She then grabbed a ruler, taped two cap erasers to each end and thought the caps would leave eraser marks she could go back and trace after rotating the ruler. That didn’t work, no marks. She then cut her pencil to get some lead and taped that to one end.

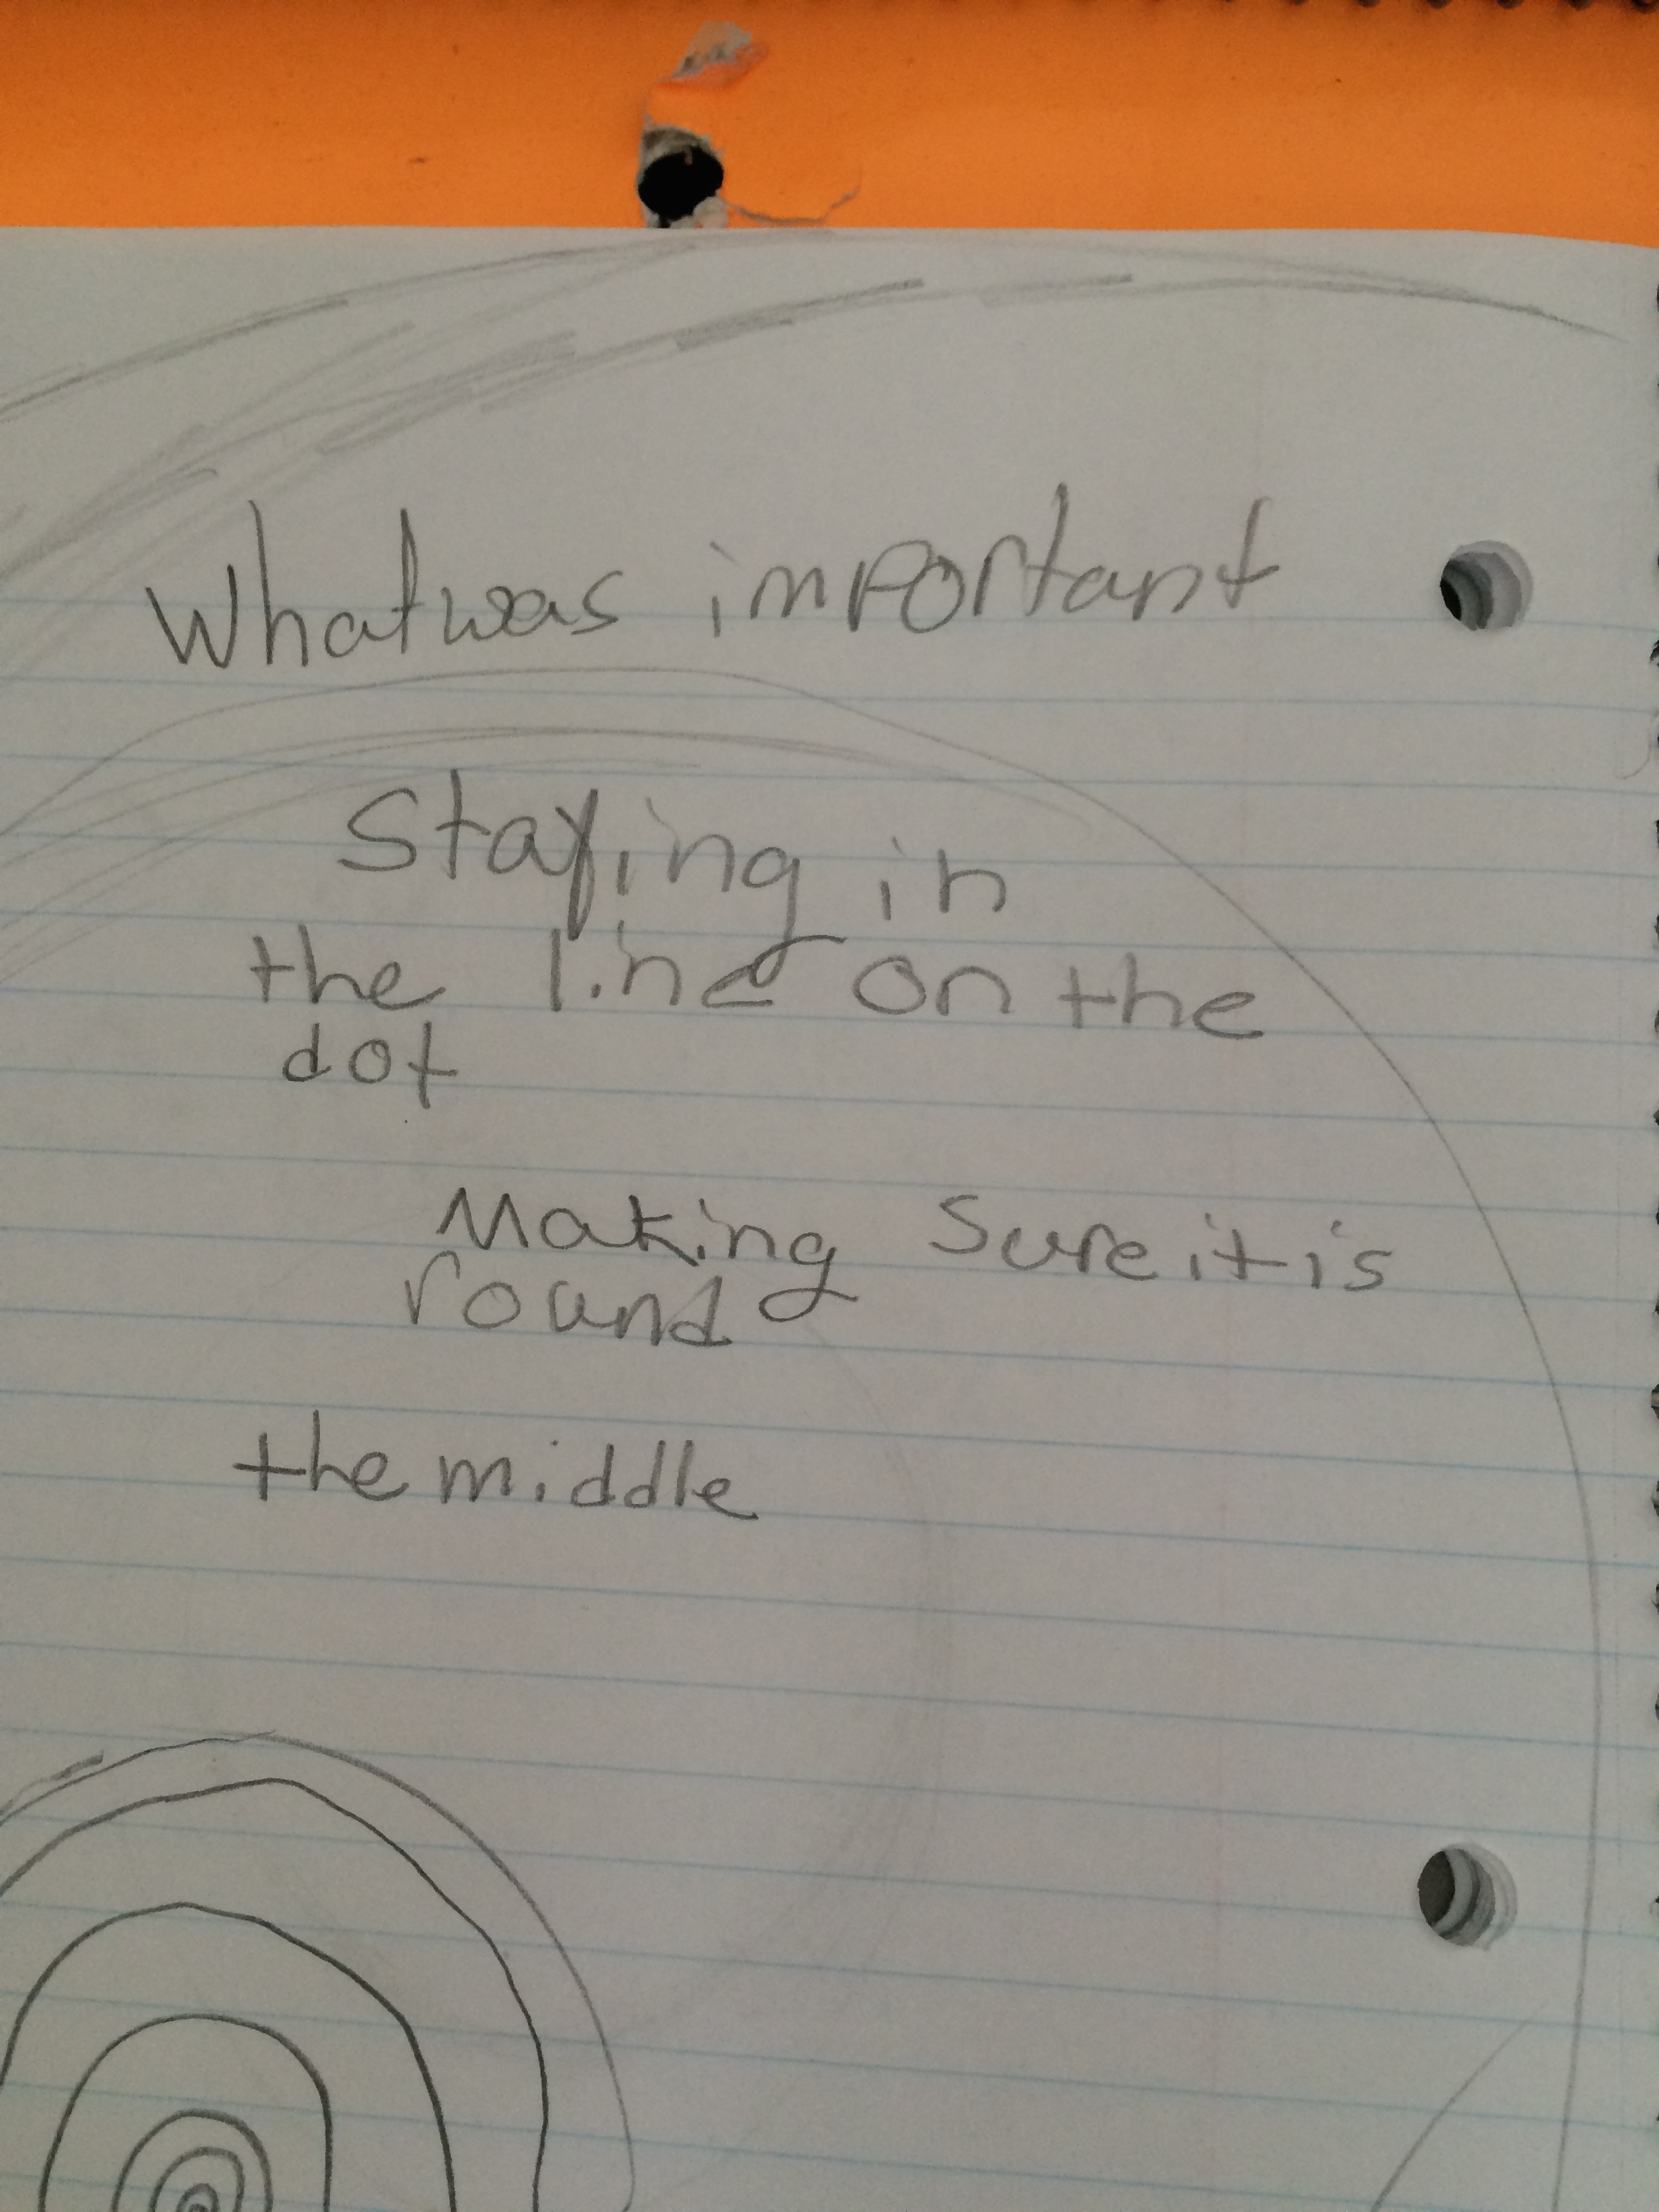
The final product….. After sharing their circles and approaches, I had the students jot down some things that were important when constructing their circles.


From these, I realized (and was surprised) the students have some circle vocabulary in their toolbox. I decided to get that out so we could be sure everyone in the class had exposure to all of this great stuff. I asked them to share their findings and what measurements they used or could find in their circle.
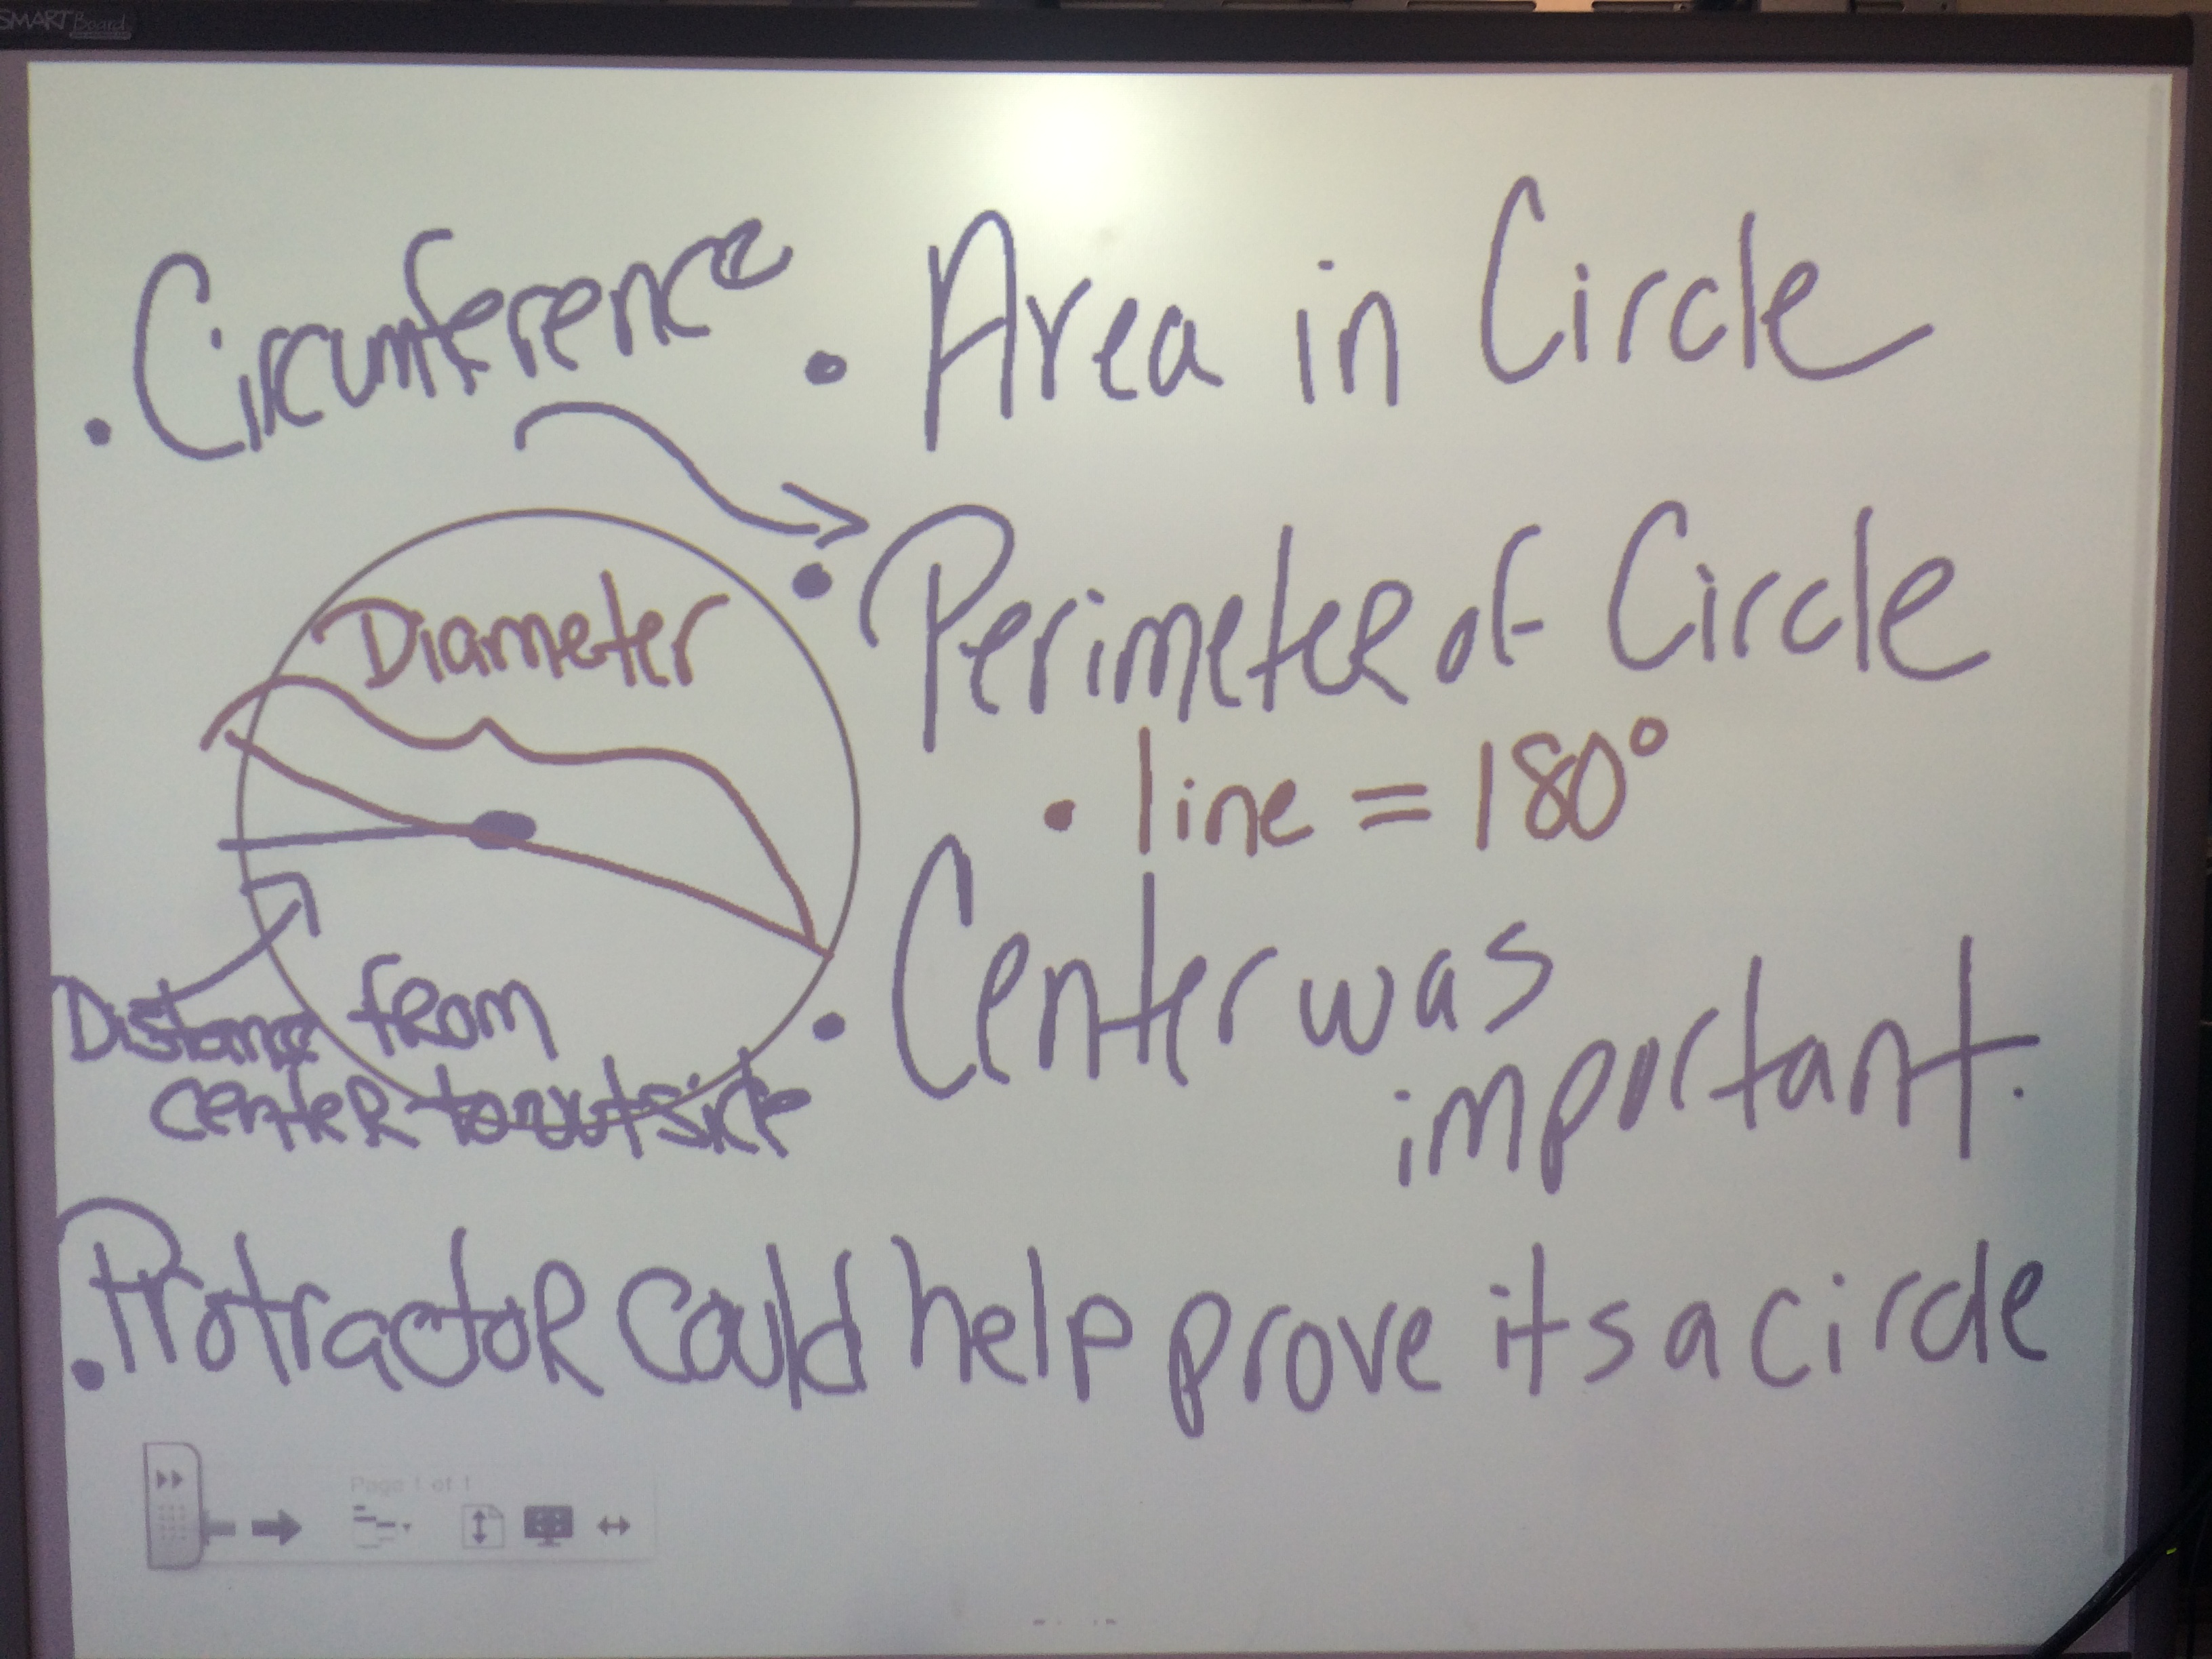 One group had finished their circle early, so I asked them to find some of these measurements. They found the diameter and circumference with the ruler and string they had used in the construction. It was so interesting to see the intuition students have around finding the diameter. They knew it had to go through the center and that no matter where they measured from, it would be the same. It makes me wonder why we, as teachers, sometimes think that we need to give students definitions for things before they get to demonstrate their intuition around these very ideas. I could have told them “diameter is distance across the circle through the center” before the lesson started, but they already knew that, love it.
After testing a few circles, this group started to see pi emerge…


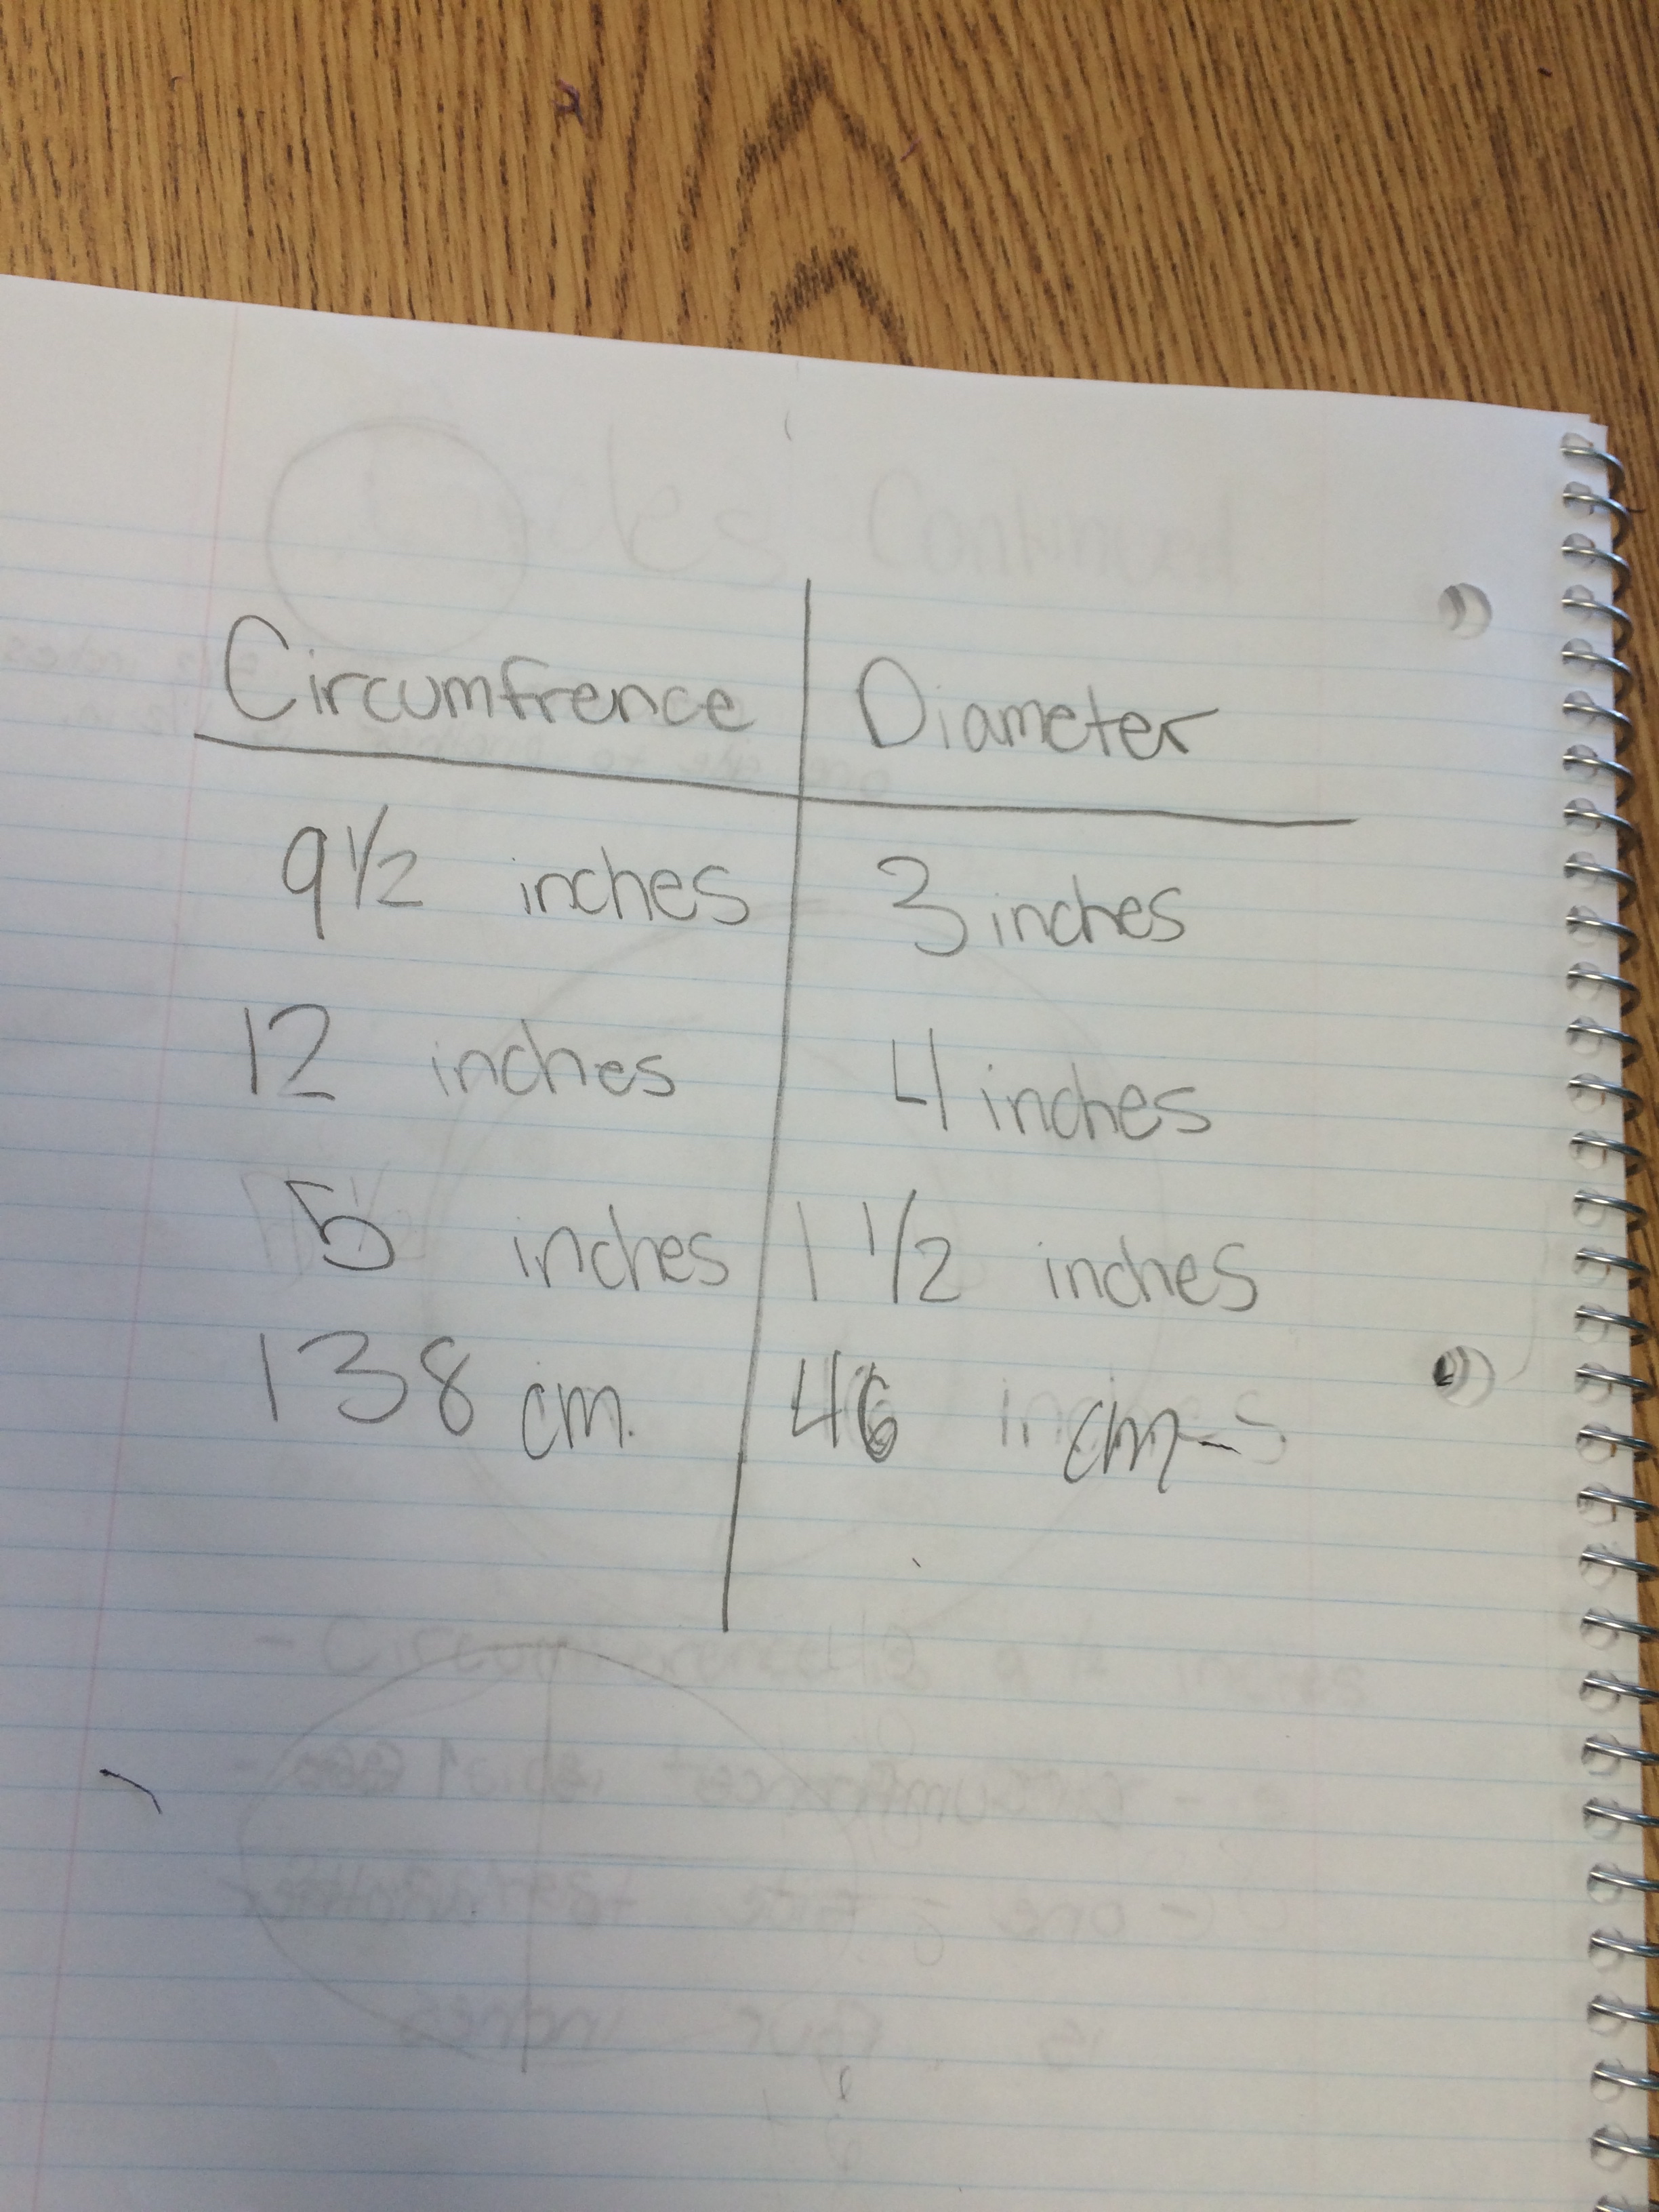 For the the last circle in this list, they measured the diameter of their large circle they created and I asked them to estimate the circumference. After seeing that each circumference was “about 3 times as much,” they estimated 46 x 3 to be circumference. They haven’t had a chance to test it on the actual circle yet because we ran out of time, but that will be some fun on Monday!
Happy Pi Day 2015!
-Kristin

I love the notion of waiting until kids have time to explore and come up with their own definitions. Using questions like “Does that always work?” or “can you wreck this definition?” would be great ways to help them build on their intuition! Always fun to see what kinds of ideas kids come up with when their teacher is genuinely curious! Excellent inquiry Pi Day activity. So many of the online activities are so procedural or not at all inquiry-based. Good for you!
LikeLike
What great stuff for your students! Pretty cool to bring these experiences to them each and every day. You are a powerful teacher with amazing ideas!
Wish I could place my own kids in your class!
Keep up the great instruction…
Craig
#compelledtribe
LikeLike
I wish I could pin your ideas from your blog to my math Pinterest boards!
LikeLike
Now that is a fantastic exploration of circles. I appreciate the simple “what was important” question that opened the door to a nice discussion/reflection. Would you say midst of the students’ prior knowledge about circles from outside of the classroom?
LikeLike